How to Attach a Camera to a Tripod: A Beginner’s Guide
Mastering your tripod attachment ensures gear safety, prevents stability issues, and makes quick equipment changes seamless for any photography project.
By the Niche Picks editorsUpdated November 9, 20268 min readDrawn from our 34 research-based photography & videography reviews
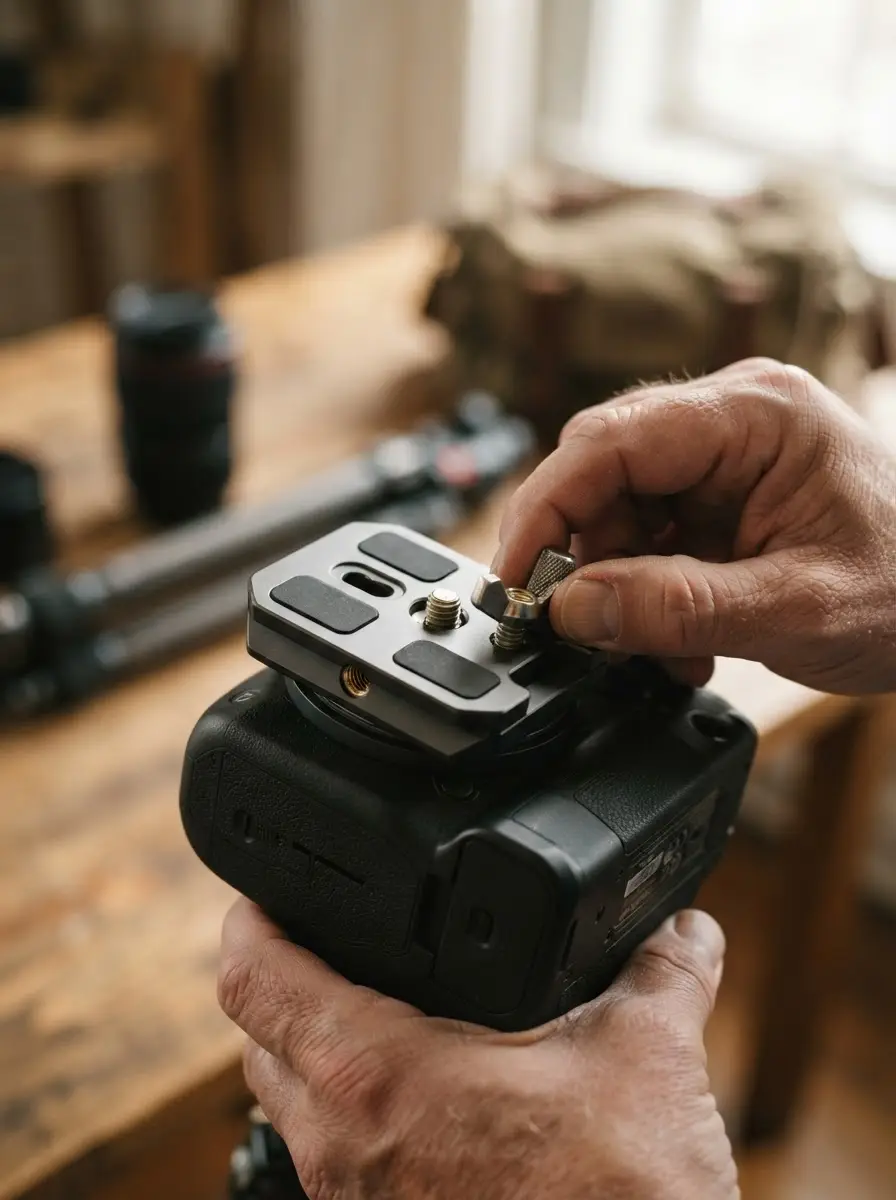
AI-generated editorial illustration; not a product or test photograph.
Short answer
To attach your camera to a tripod, align the tripod’s quick-release plate with the camera’s bottom mounting socket and tighten the screw firmly using a coin or the integrated D-ring. Once secure, slide the plate into the tripod head until you hear a definitive click or feel the locking lever snap into its fully engaged, secure position.
4
Product listings discussed; not hands-on tests
4/4
Discussed listings with a recorded price
$18.89–$49.99
Recorded listing price range; not a complete setup cost
Key takeaways
Always check the tripod plate screw for a tight, secure fit before mounting your camera to prevent rotation.
Verify the combined weight of your camera body and lens stays below your tripod's stated payload capacity to avoid instability.
Use a quick-release system to save time when switching between handheld and tripod-based shooting workflows.
Engage the secondary safety lock on your tripod head immediately after mounting to prevent accidental release.
Consider the structural rigidity of leg sections, as full extension increases the risk of vibration in budget tripods.
Products discussed in this article
Editorial scores and recorded prices are reference points, not measurements of suitability for every use. Read each review's specifications and limitations.
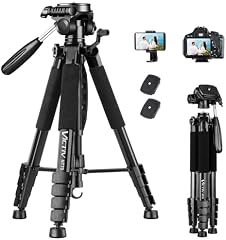
VICTIV 74” Camera Tripod, Tripod for Camera and Phone$31.99
Comparison of Entry-Level Tripod Support Systems
Product
Max Height
Payload Capacity
Weight
Best Use Case
Amazon Basics 50-inch
50 in
4.4 lbs
1.4 lbs
Lightweight smartphones
XXZU 75-inch
75 in
17.6 lbs
2.18 lbs
Tall mobile vlogging
K&F Concept 64-inch
64 in
17.6 lbs
2.53 lbs
Travel mirrorless
VICTIV 74-inch
74 in
N/A
3.14 lbs
Eye-level video
Why Proper Mounting Matters
Mounting a camera securely to a support system is the fundamental first step in professionalizing your imagery. Whether you are using the Amazon Basics 50-inch Lightweight Tripod or a more robust unit, the physical connection between camera and plate is the point of greatest vulnerability. A loose screw can lead to catastrophic equipment failure, where your expensive camera body or lens impacts the ground. By ensuring the quick-release plate is flush against the base of the camera body, you eliminate the risk of the camera rotating unexpectedly during a long exposure or video take.
Investing in proper support is just as critical as your choice of optics. Following the core photography purchasing rules, it makes sense to budget for a solid base so you can focus your remaining capital on high-quality lenses. A tripod that holds its position effectively allows you to use lower ISO values, resulting in cleaner files with better dynamic range. Always confirm that your camera body's mounting socket is free of debris before threading the tripod screw. If your setup feels wobbly, do not force it; verify that the plate is locked completely. Proper assembly ensures you get the most out of your gear, whether you are shooting on a budget mirrorless camera or an advanced professional rig. Always prioritize a stable connection before you begin setting exposure variables, as the tripod's role is to act as an unshakeable foundation for your creative work.
Modern tripods rely on a quick-release system to speed up the transition between handheld and stabilized shooting. Tripods like the XXZU 75-inch Camera Tripod utilize this system to allow users to attach and detach equipment in seconds. The plate usually features a D-ring or a slotted screw that fits the universal 1/4-inch thread found on almost all consumer digital cameras. It is vital to orient the plate correctly; some plates have specific front-to-back orientations that allow them to seat into the tripod head properly.
When attaching the plate, ensure the rubber padding is clean. This padding provides the necessary friction to prevent the camera from swiveling while mounted. If you frequently switch between a tripod and a gimbal, such as the DJI RS 4, getting into the habit of checking this connection is crucial. Never assume a plate is locked until you hear the audible click of the safety pin or see the lever shift into its secured, locked position. For users who struggle with small mounting screws, keep a flat-head tool or even a simple coin in your kit bag to ensure a tighter, more permanent fit that won't vibrate loose over time. Refer to our photography and videography buyer's guide for more tips on selecting the right gear for your specific shooting needs. Always verify the plate orientation matches the specific head design of your support system.
Most quick-release plates have a screw slot designed for a coin. Using a coin provides much better leverage than your fingers, ensuring the plate won't rotate during use.
Achieving Balance with Heavier Lens Kits
Once the plate is attached to the camera, you must consider the balance of your entire rig, especially when using larger lenses. Using a heavy zoom lens like the Tamron 17-70mm f/2.8 shifts your camera's center of gravity forward. If your tripod head is small, like that found on the K&F Concept 64-inch Tripod, you may find that the head creeps downwards unless the friction tension is set correctly. The key is to distribute the weight across the center column of the tripod. When possible, attach the tripod plate to the lens tripod collar instead of the camera body. This creates a much more balanced pivot point, which drastically reduces the stress on the tripod's ball head or pan-tilt mechanism.
If you find your rig vibrating, check the legs first. Thin-walled aluminum tripods often flex under the weight of telephoto glass. Before you blame the mount, ensure your leg sections are fully extended from top to bottom and that the locks are tightened. Using a ballast hook, a feature found on models like the VICTIV 74-inch Tripod, allows you to hang your camera bag under the center column to add weight and dampen vibrations. This is an essential technique for anyone shooting long exposure photography where even the slightest breeze can ruin your shot. Always keep your center of gravity as low as possible to maintain stability in varied outdoor environments where wind speeds fluctuate unpredictably.
One of the most frequent errors beginners make is neglecting the secondary safety mechanism on the tripod head. Many quick-release plates have a small spring-loaded pin that prevents the plate from sliding completely out if the primary lock is accidentally disengaged. If you do not push the plate fully past this pin, the connection may feel secure but can actually slide off the mount unexpectedly. Never place your trust in a mount without first verifying that the locking lever has reached its maximum travel distance.
Another frequent issue involves over-tightening. While you want a firm connection, metal threads on a camera body can be stripped if you apply excessive force with a wrench. Always hand-tighten the screw until it feels snug, then use just a small extra turn to ensure it stays put. If your camera continues to rotate, the issue is likely not a lack of torque, but a worn rubber gasket on the plate that needs replacement. To see more common pitfalls, read our article on mistakes to avoid in photography. Finally, ensure you are not obstructing battery doors or memory card slots when placing the plate. There is nothing more frustrating than needing to change a battery during a time-sensitive shoot only to realize you must remove the entire tripod plate to open the compartment door. Check your camera's layout before every session to ensure that the plate placement is optimal and does not block critical functionality.
Check the Secondary Lock
Always verify that the safety pin on your tripod head has clicked into place. This small pin is the only thing preventing your camera from sliding off if the main lever is accidentally opened.
Maintaining Your Support System
Your tripod and mounting plates are tools that require maintenance just like your camera or lenses. Dust and sand can easily find their way into the grooves of the mounting plate or the locking mechanism of the tripod head. After shooting in dusty or sandy conditions, take a moment to wipe down the tripod legs and the mounting area with a dry cloth. If you find the legs are becoming difficult to extend or lock, check if there is debris in the lever locks. Do not use heavy lubricants or oils, as these will simply attract more dust, leading to gummed-up mechanisms.
If you are looking for more ways to manage your gear, consult our photography and videography FAQ for troubleshooting advice. It is also wise to check the plate screws periodically. Over months of use, the screws can vibrate loose. Keeping an extra plate in your gear bag is a low-cost insurance policy against losing the only one you have. If you find your current support setup is simply too flimsy to hold your gear steady, it may be time to upgrade to a more rigid model. Browse our latest best budget tripods to find a more robust solution that will provide the stability your photography deserves. Remember that your support system is the foundation of your craft; treating it with the same care as your Canon RF lenses will ensure you get consistently sharp results for years to come. Routine inspection prevents the mechanical failures that can compromise your photographic work.
When filming, stability is paramount. Unlike still photography, which can often recover from minor shake, video captures every movement of an unstable rig. If you are using a lighter support like the NiceVeedi Lighting Kit stand for accessories, remember that these are not designed for heavy camera loads. Keep your video rig optimized by using a dedicated video head if possible, which allows for smoother panning and tilting. If you are using a standard three-way head, ensure that all axis locks are fully tightened after you frame your shot. A loose head can cause a gradual drift in your composition that is impossible to correct in post-production.
For hybrid shooters using cameras like the Canon EOS R100, the lack of in-body image stabilization makes a tripod even more essential. By keeping your camera firmly fixed to a steady surface, you reduce the workload on your lens's optical stabilization and help the camera's sensor stay aligned with your subject. Always verify that your tripod's center column is retracted if you do not need the extra height; the further you extend the center column, the more susceptible your camera becomes to wind and minor vibrations. For professional-grade results, aim to keep your tripod legs spread wide and the center column low. Consistent habits when attaching and leveling your tripod pay off in cleaner footage and sharper images across all your production environments. Always double-check your bubble level before hitting record to ensure your horizon is perfectly flat, as skewed video frames detract from the viewer experience and are difficult to adjust without cropping and losing resolution.
1Locate the 1/4-inch threaded mounting hole on the bottom of your camera.
2Place the tripod's quick-release plate over the hole.
3Rotate the screw or D-ring on the plate clockwise until firm.
4Ensure the plate is flush, then slide it into the tripod head mount.
5Listen for an audible click and ensure the locking lever is fully closed.
6Test the connection by gently wiggling the camera body.
Quick checklist
Clean the bottom of the camera to remove dust.
Align the mounting plate screw with the 1/4-inch thread.
Tighten the plate until it cannot be twisted by hand.
Ensure the plate is flush against the camera base.
Slide the plate into the tripod head until the lever snaps shut.
Check for any wobbling or movement.
Engage the secondary safety lock if equipped.
Frequently asked questions
Are all tripod plates universal?
No, many tripod brands use proprietary plate designs. While the 1/4-inch screw thread is universal, the shape of the plate itself varies. If you lose your plate, you must purchase a replacement specifically designed for your exact tripod model.
Can I mount a heavy lens directly to the tripod?
Yes, if your lens has a tripod collar. Mounting a heavy telephoto lens to the tripod instead of the camera body shifts the weight closer to the center, significantly reducing strain on your tripod head and improving overall balance.
How tight should I make the tripod plate screw?
Tighten the screw until it feels snug and the plate no longer rotates under gentle pressure. Over-tightening can damage the threads on your camera body, so stop as soon as the plate is securely locked in position.
What is a quick-release lever?
A quick-release lever is the mechanism on the tripod head that grips and holds the mounting plate. It allows you to rapidly detach your camera without unscrewing the plate, provided you push the release button or shift the lever correctly.
Does it matter if my tripod is made of aluminum or carbon fiber?
Yes. Carbon fiber tripods are generally more expensive but offer superior vibration dampening and lower weight compared to entry-level aluminum options. However, for most beginners, aluminum is a perfectly adequate foundation for light camera kits.
Amazon links are affiliate links; we may earn a commission at no cost to you.
Shortlists in this category
Ranked lists from our photography & videography reviews, limited to listings whose titles confirm the product type, with budget cuts where enough recorded prices sit on both sides of the line.
This page summarizes our research reviews of Amazon listings, listed specifications and captured buyer ratings. It is not a hands-on test. Scores are editorial assessments, not measured performance; prices are recorded snapshots and may change. A category can include both main products and accessories, so its overall price range is not the cost of a complete setup.
Most recent product record update: September 14, 2026. Individual records may be older; this is not a verification date for every claim. Prices on this page were read from the listings Nov 8, 2026 – Nov 11, 2026.
Compare the same kind of photography & videography
Choose the product type first. These groups require a match in the listing title; an import search term alone is not enough. Scores rank our recorded research assessments within each group, not independently measured performance.
Values are shown as recorded, without unit conversions or inferred compatibility. Not recorded means unknown, not absent. Prices are snapshots, not current offers. Editorial scores are research judgments, not lab results. Amazon links are affiliate links.
Before treating a comparison as complete
Which details are still unknown?
A specification appearing in a listing is not independent verification. These counts show which shortlisted records contain the same field; a blank record does not mean the product lacks the feature.
Included Components
Recorded for 2 of 2 shortlisted models
Present in every shortlisted record. Check units, exact variants and the current manufacturer documentation before relying on it.
Item Weight
Recorded for 2 of 2 shortlisted models
Present in every shortlisted record. Check units, exact variants and the current manufacturer documentation before relying on it.
Item Length
Recorded for 2 of 2 shortlisted models
Present in every shortlisted record. Check units, exact variants and the current manufacturer documentation before relying on it.
Maximum Height
Recorded for 2 of 2 shortlisted models
Present in every shortlisted record. Check units, exact variants and the current manufacturer documentation before relying on it.
Warranty Description
Recorded for 2 of 2 shortlisted models
Present in every shortlisted record. Check units, exact variants and the current manufacturer documentation before relying on it.
Check sustained record limits and overheating, not headline codecs.
V30/V90 card ratings decide whether high-bitrate video drops frames.
If a specification, certification or compatibility detail is absent, mark it as unknown and ask the seller or manufacturer. Do not substitute a star rating, an editorial score or a different model's specification.