How to Use Trekking Poles: Essential Techniques for Hikers
Master the fundamentals of using trekking poles to protect your joints and improve your balance on any trail with these expert setup and usage tips.
By the Niche Picks editorsUpdated November 9, 202610 min readDrawn from our 33 research-based hiking footwear & backpacks reviews
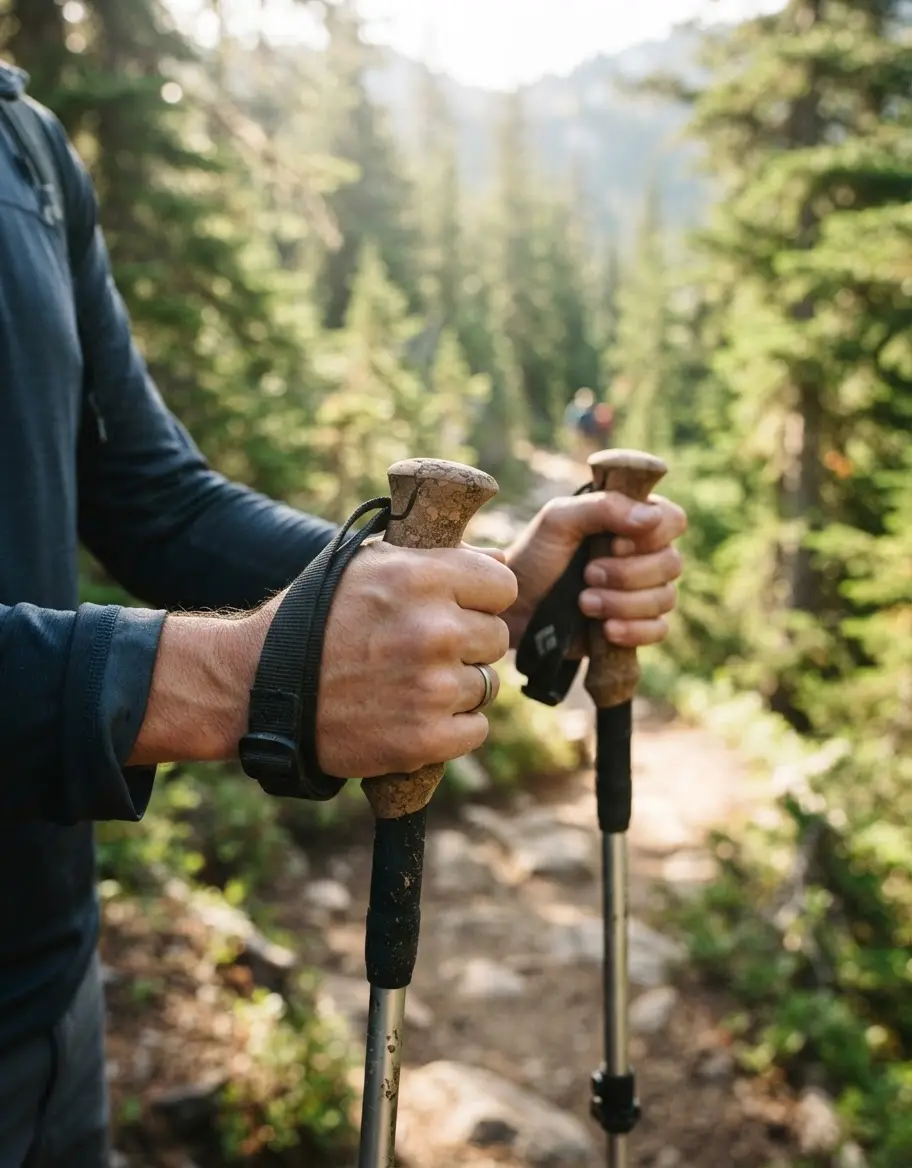
AI-generated editorial illustration; not a product or test photograph.
Short answer
To use trekking poles correctly, adjust them so your elbows sit at a 90-degree angle on level ground. Always insert your hands through the wrist straps from the bottom to allow the straps to bear your weight, and maintain a rhythmic, alternating planting motion where the pole hits the ground alongside your opposite foot.
4
Product listings discussed; not hands-on tests
4/4
Discussed listings with a recorded price
$24.98–$64.99
Recorded listing price range; not a complete setup cost
Key takeaways
Set your pole length by ensuring your elbows rest at a 90-degree angle on flat ground.
Insert your hands through the straps from below to shift weight-bearing stress to your wrists.
Use a rhythmic gait, planting your pole simultaneously with the opposite foot's heel strike.
Shorten poles for steep uphill ascents and lengthen them for steep downhill sections.
Aluminum poles provide superior durability, while carbon fiber offers significant weight savings for long-distance hikers.
Products discussed in this article
Editorial scores and recorded prices are reference points, not measurements of suitability for every use. Read each review's specifications and limitations.
Cascade Mountain Tech Trekking Poles - Carbon Fiber$64.99
Telescopic Trekking Poles for Hiking, Anti-Shock$24.98
Comparison of Top-Rated Trekking Poles
Product
Material
Mechanism
Weight per Pair
TrailBuddy Poles
7075 Aluminum
Lever Lock
1.2 lbs
CMT Aluminum
6061 Aluminum
Lever Lock
1.2 lbs
CMT Carbon Fiber
Carbon Fiber
Lever Lock
1.0 lbs
TheFitLife
Aluminum
Twist Lock
1.2 lbs
Why Trekking Poles Are Essential for Every Hiker
Trekking poles are frequently misunderstood as accessories for the elderly or elite mountaineers, but they are vital tools for any hiker looking to extend their trail longevity. By creating a stable four-point contact system, poles shift physical load away from your knees and ankles, which is particularly crucial during long descents. Our research into gear like the TrailBuddy Trekking Poles underscores the value of impact resistance; when you use poles to support your weight, you significantly reduce the cumulative stress on your connective tissues. This is especially important for backpackers carrying heavy loads, where the center of gravity is naturally shifted.
Beyond joint protection, poles enhance balance and rhythmic efficiency. On uneven terrain, a well-placed pole acts as a third (and fourth) leg, allowing you to traverse slippery roots or loose scree with confidence. By maintaining an upright posture, you also open your chest for better breathing, allowing for more sustained aerobic output on steep inclines. Integrating these tools into your kit requires basic training, but once mastered, the physical difference is profound. For those starting their journey, our Best Hiking Poles: Top Aluminum Picks for Rugged Trails explains how durability factors into your decision. Whether you are walking in flat forests or climbing high peaks, the goal remains the same: to maximize your energy efficiency and minimize fatigue. Remember that your Hiking footwear & backpacks also play a crucial role in total stability; a well-fitted pack and supportive shoes, when combined with proper pole usage, create an ideal system for backcountry comfort. If you are uncertain about your current setup, checking our mistakes to avoid can prevent common errors that lead to early trail exhaustion.
The foundation of effective pole use is accurate sizing. If your poles are incorrectly adjusted, you will quickly encounter shoulder discomfort, back strain, or wasted energy. The universal starting point is the '90-degree rule': on level ground, stand upright and hold your pole grip so your elbow is bent at a perfect 90-degree angle. This allows your arm to move naturally and provides the leverage needed to plant the tip securely.
Stand on flat ground with your hiking boots on to account for heel stack height.
Loosen the locking mechanism, such as the lever locks on the Cascade Mountain Tech Lightweight Aluminum, and slide the section until your elbow hits that 90-degree mark.
During steep climbs, shorten the poles by 5-10 centimeters to keep your hands higher relative to your body, reducing the reach required for each plant.
During descents, lengthen the poles by 5-10 centimeters to improve your reach and provide a solid brace against downward momentum.
Never treat pole height as a static setting. The terrain changes constantly, and your technique must adapt. For day-long treks, expect to adjust your pole length multiple times as you transition from valley floors to steep switchbacks. Our Hiking footwear & backpacks buyer's guide often emphasizes how torso fit is critical for pack comfort, and the same principle applies to pole geometry; improper alignment can ruin your posture. By mastering these field adjustments, you ensure that your muscles are working in their most efficient range. For further research on finding the gear that fits your specific stature, visit our Best Hiking Poles: Top Aluminum Picks for Rugged Trails to see how various designs accommodate different heights.
Always adjust your wrist straps while wearing your hiking gloves. A strap that fits perfectly with bare hands will often be too tight once you add the bulk of cold-weather gear.
Proper Hand Positioning and Strap Use
Many casual hikers hold the handle too tightly, which contributes to hand fatigue, numbness, and poor pole control. The most efficient way to use trekking poles is to let the straps carry the load. By inserting your hand through the loop from the bottom—so the strap rests against your palm and the back of your hand—you can push down on the strap itself rather than white-knuckling the grip. This allows your hand to stay relaxed, improving circulation and grip longevity over long, grueling miles.
Insert your hand from below the strap so the strap encircles your wrist and palm.
Keep your grip loose; the pole should naturally hang from your wrist when you release your fingers.
Plant the pole tip near your mid-foot, never too far in front, to avoid overextending your stride.
Utilize the extended EVA foam grips found on models like the Cascade Mountain Tech Lightweight Aluminum to 'choke down' on the pole on steep sections, which acts similarly to shortening the pole without adjusting locks.
Developing a fluid rhythm is essential. Your poles should move in sync with your legs: as your left foot moves forward, your right pole plants; as your right foot moves forward, your left pole plants. This cross-body movement mimics natural walking mechanics and keeps you balanced. If you feel your arms tiring, check your technique; you might be planting the poles too aggressively or leaning too hard on them. If you are still refining your hardware choices, reading Best Hiking Poles: Top Aluminum Picks for Rugged Trails can help you understand which grip materials—such as moisture-wicking cork—best suit your climate needs. Avoid the common error of neglecting your strap adjustments; always test them while wearing your intended hiking gloves to ensure they fit properly.
Material selection is a balance between durability and performance. Aluminum poles, such as the Telescopic Trekking Poles, are the gold standard for durability. Aluminum’s primary advantage is its 'ductility'; if you accidentally jam a pole between rocks and trip, an aluminum shaft will likely bend, which can often be straightened in the field to allow you to complete your hike. This makes them a highly reliable choice for technical terrain where the potential for extreme lateral loads is high. In contrast, carbon fiber poles, like the Cascade Mountain Tech Carbon Fiber, are engineered to be ultralight and rigid. This stiffness reduces vibration transmission into your joints, and the lower swing weight significantly reduces muscle fatigue during high-mileage days. However, carbon is more susceptible to brittle failure; a significant impact or pinch can result in a clean snap that cannot be fixed in the field.
Choose aluminum if you are a beginner or frequent rocky, technical routes where durability is prioritized.
Choose carbon fiber if your primary goal is minimizing weight to increase speed or comfort on long-distance treks.
Your specific hiking style should dictate your choice. If you tend to hike with a light, fast approach, carbon fiber is a transformative upgrade. If you are carrying a heavy, fully-loaded multi-day backpack and want the peace of mind that your gear won't snap in the middle of a remote canyon, aluminum is the wiser investment. Don't forget that your choice of Best Hiking Backpack: 2 Smart Day-Hike Picks will influence how much weight your poles need to help you support. Regardless of material, consistent maintenance—like cleaning shafts and checking lock tensions—will ensure your investment lasts for years.
If your lever locks feel loose, don't force them. Simply open the lever and tighten the small tension screw with your fingers or a screwdriver to ensure the pole remains secure.
Maintenance and Troubleshooting
Your poles require basic, routine maintenance to function reliably over many seasons. The most common issue with telescoping poles is slippage, which is often caused by debris accumulation inside the shaft or improper tensioning of the locking mechanism. If you use twist-lock poles, the internal expander can lose its grip if it is dusty or dirty; keeping the sections clean is essential. For lever-lock systems, most models have a small tension adjustment screw. If the lever snaps shut with absolutely no resistance, simply open the lever and give the screw a quarter-turn clockwise.
Always collapse and dry your poles after a wet hike; moisture trapped inside can lead to corrosion.
Periodically wipe down the shaft sections with a clean cloth to remove trail grit that can damage locking mechanisms.
If your rubber tip wears down, replace it promptly to maintain traction on hard surfaces and protect your pole's tungsten-carbide tip.
Use the appropriate basket for the season; mud baskets are fine for forest floors, but snow baskets are non-negotiable for winter.
Regularly checking the condition of your poles is just as important as maintaining your Hiking footwear & backpacks. If you hear a rattling sound inside, it may indicate a loose internal part; tightening the locking hardware usually resolves this. For hikers who spend much of their time on varied trails, our Best Hiking Poles: Top Aluminum Picks for Rugged Trails includes recommendations for poles that come with comprehensive tip kits, saving you the trouble of hunting for compatible parts later. Taking two minutes to check your gear before you leave the trailhead is the best way to ensure a successful and pain-free trip. If your poles feel slippery during use, it is almost always due to a lack of tension in the locking system rather than a product defect; a simple manual adjustment is all that is typically required to get back on track.
Trekking poles are most effective when your strategy changes alongside the trail. Experienced hikers do not use their poles the same way for every mile. When ascending a steep, sustained slope, you might use a 'two-pole plant' technique to push off, giving your quads and calves a brief assist. When traversing a gentle, flat forest path, you might adopt a 'pole-swing' technique, where the poles barely touch the ground and serve primarily to maintain your rhythm and stability.
On steep ascents, focus on pushing off the poles to drive momentum upward.
On steep descents, place your poles firmly in front of you to create a tripod effect, which helps absorb your weight and protects your knees from impact.
When crossing streams, use your poles to test the depth and provide stability on slippery submerged rocks.
When taking a break, use your poles as a makeshift backrest by planting them firmly and leaning against them to rest your legs and spine.
If you find that your technique feels clunky or uncoordinated, practice is your best friend. Start on a flat, well-maintained path to get the rhythm down before taking your poles into technical or steep environments. Reading through our Best Hiking Poles: Top Aluminum Picks for Rugged Trails can also provide insight into which designs offer the most versatile handle layouts for different hand positions. Whether you choose a carbon set for weight or an aluminum set for raw durability, your focus should be on integrating the tool into your natural biomechanics. If you are new to the trail, browsing Best Hiking Backpack: 2 Smart Day-Hike Picks will help you understand how a good pack load balance complements your poles. Remember, the goal of trekking poles is to make the journey easier, not to add another item to manage; with a bit of habit-building, you will find you rarely think about your poles at all—you will just feel the difference in your joints at the end of the day.
2Loosen the shaft locks and adjust the length until your elbow forms a 90-degree angle.
3Slide your hand through the wrist strap from the bottom.
4Grip the handle lightly so the strap supports your palm.
5Begin walking with a natural gait, planting the opposite pole with each footstep.
6Shorten poles by 5-10cm for steep ascents; lengthen them by 5-10cm for descents.
Quick checklist
Check all locking mechanisms for security before starting your hike.
Ensure pole tips are fitted with rubber caps for pavement or sensitive natural areas.
Practice your walking rhythm on flat terrain to get comfortable with the motion.
Select the correct baskets—mud for summer, snow for winter—before heading out.
Adjust your pole length based on the specific gradient of your intended trail.
Inspect strap comfort to ensure they don't create friction hotspots on your wrists.
Frequently asked questions
Are trekking poles worth the weight penalty?
Yes. For most hikers, the energy saved in the legs and the joint protection during descents far outweigh the small weight of a pair of poles, which typically ranges from 1 to 1.5 pounds.
Is it better to use one or two trekking poles?
Using two poles provides balanced support and better stability, which is superior for joint protection. A single pole is helpful for light, flat walking but lacks the symmetry needed for steep or technical terrain.
Why do my trekking poles keep collapsing?
If your poles are slipping, it is usually due to loose locking mechanisms or debris inside the shafts. Tighten the tension screws on lever-lock poles or clean and tighten the internal expander on twist-lock models.
How long should my trekking poles last?
With routine cleaning and proper maintenance of the locking mechanisms, high-quality poles can last for hundreds of trail miles. Aluminum models are the most durable, while carbon fiber needs careful inspection for cracks.
What happens if a carbon fiber pole breaks?
Unlike aluminum, which may bend and remain usable, carbon fiber is brittle. If a carbon pole snaps under load, it typically cannot be repaired in the field, making it a liability on very remote or multi-day expeditions.
Amazon links are affiliate links; we may earn a commission at no cost to you.
Shortlists in this category
Ranked lists from our hiking footwear & backpacks reviews, limited to listings whose titles confirm the product type, with budget cuts where enough recorded prices sit on both sides of the line.
This page summarizes our research reviews of Amazon listings, listed specifications and captured buyer ratings. It is not a hands-on test. Scores are editorial assessments, not measured performance; prices are recorded snapshots and may change. A category can include both main products and accessories, so its overall price range is not the cost of a complete setup.
Most recent product record update: November 8, 2026. Individual records may be older; this is not a verification date for every claim. Prices on this page were read from the listings Nov 8, 2026 – Nov 11, 2026.
Compare the same kind of hiking footwear & backpacks
Choose the product type first. These groups require a match in the listing title; an import search term alone is not enough. Scores rank our recorded research assessments within each group, not independently measured performance.
Values are shown as recorded, without unit conversions or inferred compatibility. Not recorded means unknown, not absent. Prices are snapshots, not current offers. Editorial scores are research judgments, not lab results. Amazon links are affiliate links.
Before treating a comparison as complete
Which details are still unknown?
A specification appearing in a listing is not independent verification. These counts show which shortlisted records contain the same field; a blank record does not mean the product lacks the feature.
Shaft Material
Recorded for 2 of 2 shortlisted models
Present in every shortlisted record. Check units, exact variants and the current manufacturer documentation before relying on it.
Waterproof liners trap sweat — skip them in dry climates.
Torso length, not pack litres, determines fit.
Carbon poles save grams; aluminium survives a fall.
If a specification, certification or compatibility detail is absent, mark it as unknown and ask the seller or manufacturer. Do not substitute a star rating, an editorial score or a different model's specification.