Learn how to capture wild yeast, maintain feeding ratios with precision tools, and cultivate a robust sourdough culture for baking artisan bread at home.
By the Niche Picks editorsUpdated November 5, 20269 min readDrawn from our 32 research-based bread baking equipment reviews
AI-generated editorial illustration; not a product or test photograph.
Short answer
To make a sourdough starter from scratch, combine equal weights of flour and unchlorinated water in a clean jar, then rest it at room temperature. Discard half and feed the culture with fresh flour and water every 24 hours. Within seven to ten days, beneficial bacteria and wild yeasts establish a stable ecosystem that consistently doubles in volume.
4
Product listings discussed; not hands-on tests
4/4
Discussed listings with a recorded price
$18.99–$59.90
Recorded listing price range; not a complete setup cost
Key takeaways
A repeatable starter requires measuring ingredients by mass using a precision kitchen scale rather than volume cups.
Equal parts flour and water by weight yield a standard 100 percent hydration culture ideal for most rustic sourdough recipes.
Initial bubbling on days two or three often stems from opportunistic bacteria rather than true, stable wild yeast activity.
A healthy starter exhibits a pleasant, fruity, yogurt-like acidic aroma and doubles or triples in size within four to six hours of feeding.
Once established, starter cultures can reside indefinitely in the refrigerator between weekly feedings.
Products discussed in this article
Editorial scores and recorded prices are reference points, not measurements of suitability for every use. Read each review's specifications and limitations.
What is the science behind a wild sourdough culture?
A sourdough starter is a symbiotic culture of wild yeasts and lactic acid bacteria (LAB) suspended in a flour-and-water medium. Unlike commercial instant or active dry yeast, which consists of isolated strains of Saccharomyces cerevisiae, wild fermentation captures naturally occurring microorganisms present on grain husks and within the environment.
During the initial phase of starter development, ambient bacteria—including leuconostoc and enterobacter species—begin digesting available starches. This initial burst often creates deceptive bubbling during the first 48 hours. As these early microbes produce organic acids, the pH of the mixture drops below 4.5. This acidification naturally eliminates spoilage organisms and creates an environment where acid-tolerant yeasts, such as Kazachstania exigua and Candida humilis, can thrive alongside resilient Lactobacillus strains.
The relationship between yeast and bacteria is reciprocal. Lactic acid bacteria metabolize sugars that yeasts leave behind, generating lactic and acetic acids that give sourdough its distinctive sour taste and structural strength. Meanwhile, the yeasts produce carbon dioxide gas that aerates the dough. Maintaining this balance requires steady temperature conditions, appropriate grain nutrients, and consistent feeding schedules. Following our guide to bread baking will help clarify how microbial vitality directly impacts crumb open-structure and oven spring.
Why does weighing ingredients by mass dictate success?
Volumetric measurements such as measuring cups and spoons are notoriously inconsistent for sourdough development. A single cup of flour can weigh anywhere between 110 grams and 160 grams depending on how densely it is packed into the cup. Water, by contrast, maintains a consistent density. This discrepancy means volumetric mixing leads to wildly fluctuating hydration ratios that hinder microbial colonization.
Baking consistency relies heavily on repeatable metrics. Our editorial buying rules emphasize that a 0.1 g scale makes starter ratios repeatable. When maintaining a seed culture that weighs only 20 to 50 grams, standard 1-gram increments can introduce massive percentage variances. For example, the Etekcity 0.1g Food Kitchen Scale features a dual-increment configuration: it resolves mass in 0.1-gram increments up to 1,000 grams before transitioning to 1-gram steps up to its 5-kilogram ceiling. This graduation enables exact inoculations and micro-feedings, ensuring that a 1:1:1 feeding ratio remains mathematically identical every single day.
Using a calibrated digital scale eliminates guess-work during daily feedings. If a recipe calls for a 1:2:2 ratio—one part starter, two parts flour, and two parts water—weighing 25.0 grams of starter culture alongside 50.0 grams of water and 50.0 grams of flour guarantees precise hydration. Consistency in food and water availability stabilizes the yeast population faster, preventing the dough starvation or over-dilution that often causes starter failure.
Municipal tap water often contains chlorine or chloramines added to kill microorganisms. While safe for drinking, municipal disinfectants can inhibit the delicate wild yeasts needed to establish a young sourdough starter.
What is the daily step-by-step feeding routine?
Creating a vigorous starter requires roughly seven to ten days of systematic feedings. Maintaining clean glass jars and using unchlorinated water at roughly 75°F to 80°F ensures the fastest path to microbial maturity.
Day 1: Combine 50 grams of whole rye or whole wheat flour with 50 grams of warm water in a clear glass container. Stir thoroughly until no dry pockets remain. Cover loosely with a lid or breathable fabric to allow gas release, and let it rest in a warm spot for 24 hours.
Day 2: Leave the jar undisturbed. You may notice minor bubbling or liquid separation; this is normal. Stir the mixture once to redistribute nutrients.
Day 3: Discard all but 50 grams of the starter. Add 50 grams of unbleached all-purpose or bread flour and 50 grams of water. Mix completely and secure the lid loosely.
Days 4 to 6: Repeat the Day 3 feeding cycle every 24 hours. If the starter begins rising and falling within 12 hours, transition to twice-daily feedings spaced 12 hours apart to keep the culture fed.
Day 7 and Beyond: The culture should exhibit consistent, predictable behavior. Once it doubles or triples in volume within four to six hours of feeding, smelling cleanly sour and fruity, it is considered mature and ready for baking.
Skipping steps or changing flours erratically can reset microbial progress. To avoid common missteps, review our guide on mistakes to avoid in bread baking to protect your young culture.
How do hydration and flour selection affect starter vitality?
The choice of grain dictates what microbial life enters your jar. Whole grain flours—specifically unbleached whole rye, whole wheat, and sprouted spelt—contain higher concentrations of native wild yeasts and enzymes compared to refined white flour. Whole grain flours also contain minerals and ash that accelerate fermentation, making rye an exceptional choice for initiating Day 1.
Once a culture shows regular fermentation, transitioning to unbleached bread flour or unbleached all-purpose flour provides the predictable starch structure needed for daily baking. Bleached flours must be avoided, as the chemical bleaching process destroys native yeasts and alters pH in ways that discourage bacterial growth.
Hydration refers to the weight ratio of water to flour. A 100 percent hydration starter uses equal weights of water and flour (for instance, 50 grams of flour and 50 grams of water). This creates a thick batter consistency that easily displays trapped carbon dioxide bubbles, making volumetric expansion visible through the side of the glass. Liquid starters (hydrations exceeding 120 percent) tend to favor lactic acid production, creating milder, creamy flavors, whereas stiffer starters (around 50 to 65 percent hydration) encourage acetic acid production, delivering a sharper, punchier tang. For general bread-making, standard 100 percent hydration remains the gold standard for ease of calculation.
Do Not Seal Lids Airtight
Fermenting cultures release significant volumes of carbon dioxide. Storing a vigorous starter in a completely airtight glass jar can cause dangerous internal pressure buildup.
How do you troubleshoot sluggishness, hooch, and off odors?
During the initial week, starters exhibit dramatic shifts in appearance and aroma. Recognizing the difference between normal metabolic adjustments and true spoilage prevents bakers from prematurely discarding healthy cultures.
A common occurrence on days two and three is a strong, foul odor resembling gym socks or acetone. This smell results from opportunistic bacteria like Leuconostoc. As long as you maintain the regular feeding schedule, beneficial lactic acid bacteria will lower the pH, eliminating those odor-causing organisms within 48 to 72 hours. A mature starter should smell acidic, fruity, and reminiscent of natural yogurt or beer.
Another frequent symptom is the accumulation of a grayish or dark liquid on top of the starter, known as hooch. Hooch is an alcohol byproduct that forms when the yeast has depleted its available sugars. It is harmless and simply signals that your starter is hungry. You can pour off the hooch or stir it back in before executing a standard feeding. If hooch forms consistently within 12 hours, increase your feeding ratio from 1:1:1 to 1:2:2 or 1:3:3 to provide more food relative to the yeast inoculation.
True spoilage presents as pink, orange, or fuzzy mold across the surface. If you see visible fuzzy mold or colorful bacterial streaks, discard the culture immediately, sanitize the container with boiling water, and start fresh.
How do you transition your starter into baking artisan bread?
When your starter reliably doubles in volume within four to six hours after a 1:1:1 feeding, it possesses the enzymatic power and gas production required to leaven dough. To prepare for baking, many bakers build a levain—an offshoot feeding scaled to the exact proportions required by the recipe, preserving the core 'mother' culture in reserve.
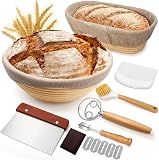
Once mixed and bulk fermented, shaping and proofing are critical steps in developing proper loaf structure. Transferring shaped dough into dedicated rattan proofing forms, such as the Superbaking Sourdough Banneton Bread Proofing Basket Set or the comprehensive EWFEN Sourdough Proofing Basket Gift Set, wicks surface moisture away from the dough exterior. This natural moisture reduction forms a taut skin that ensures clean decorative scoring and prevents loaves from flattening out on the hearth. You can read more about selecting proofing vessels in our roundup of the best bread proofing baskets.
When baking hearth-style loaves, trapped steam is mandatory to delay crust gelatinization and allow full vertical expansion. Placing dough into a heavy covered baking vessel delivers this radiant chamber. The Lodge Cast Iron Double Dutch Oven, for example, provides 5 quarts of dense, factory-seasoned cast iron. Its low-profile lid doubles as a shallow base, allowing you to load scored dough easily without risking forearm burns against deep walls. Explore our guide on whether you need a Dutch oven to bake sourdough to master steam management during your initial bake.
Dropping a spoonful of starter into water to see if it floats only measures trapped aeration, not microbial health. Dense, 100 percent rye starters may sink despite being ready to bake.
What is the best method for long-term starter storage?
Maintaining a starter on the kitchen counter requires daily feedings, which can lead to significant flour waste if you only bake once a week or twice a month. Fortunately, once a starter is fully established, temperature management allows you to regulate its metabolic rate.
For regular weekly baking, the refrigerator is the optimal storage environment. After giving your culture a standard feeding, allow it to sit at room temperature for roughly 60 to 90 minutes until subtle bubbling starts, indicating that the yeast has begun metabolizing fresh sugars. Then, secure the lid and place the jar into the refrigerator at approximately 38°F to 40°F. The low temperature dramatically slows yeast and bacterial metabolism without killing the organisms.
To bake after cold storage, remove the jar from the refrigerator 24 hours in advance. Discard excess starter, feed it at room temperature, and wait for it to reach its peak volume. A healthy, mature culture can survive untouched in cold storage for several weeks, though a weekly feeding maintains optimal vitality. For extended breaks exceeding several months, spreading active starter thinly onto parchment paper and letting it dry completely at room temperature yields dehydrated flakes that can be stored in an airtight jar for years, ready to be reconstituted with warm water and flour when needed.
Step by step
1Weigh 50 grams of whole rye flour and 50 grams of warm, unchlorinated water into a clean glass jar, stirring until thoroughly combined.
2Cover the jar loosely and let it rest at room temperature (75°F to 80°F) for 24 hours without disturbance.
3On day two, inspect the jar for early bubbling, stir once to redistribute nutrients, and re-cover loosely for another 24 hours.
4On day three, discard all but 50 grams of starter, then add 50 grams of unbleached bread flour and 50 grams of water, mixing thoroughly.
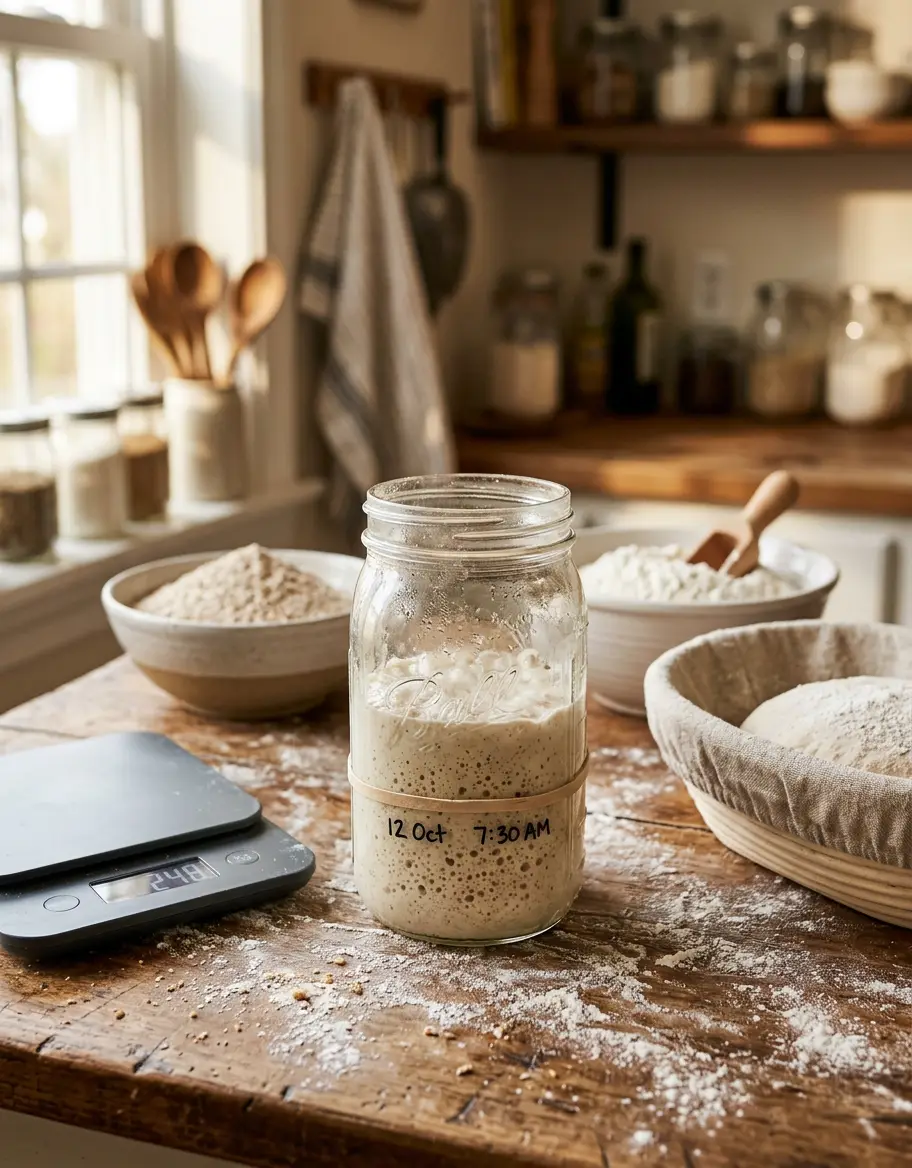
5Repeat this 1:1:1 discard-and-feed process every 24 hours on days four, five, and six, tracking rise with an exterior rubber band.
6Transition to twice-daily feedings (every 12 hours) once the culture actively rises and deflates within a 12-hour window.
7Confirm maturity on day seven or later: your culture is ready when it consistently doubles or triples in size within four to six hours of feeding.
Quick checklist
Choose unbleached flour, ideally whole rye or whole wheat for day one.
Obtain unchlorinated water at warm room temperature (75°F to 80°F).
Prepare a clear glass jar with a loosely fitting lid.
Use a digital kitchen scale resolving to 0.1 g for repeatable ratios.
Place a rubber band around the jar exterior to track volumetric rise.
Designate a stable, draft-free spot in your kitchen away from direct sunlight.
Commit to a consistent daily feeding schedule at the same time each day.
Frequently asked questions
How do I know when my sourdough starter is ready to bake bread?
Your starter is ready when it reliably doubles or triples in volume within four to six hours after a 1:1:1 feeding at room temperature. It should present a spongy, domed top filled with active bubbles, smell mildly sweet and acidic like yogurt, and maintain consistent rising power across three consecutive feedings.
Can I use bleached all-purpose flour to make a sourdough starter?
No. Bleached flour undergoes chemical treatments using chlorine gas or benzoyl peroxide, which destroy naturally occurring wild yeasts and alter the flour's natural enzymatic balance. Always select unbleached all-purpose, unbleached bread flour, or whole grain flours like rye and whole wheat to cultivate a healthy microbial colony.
What is the clear or dark liquid on top of my sourdough starter?
The liquid is hooch, an alcohol byproduct produced when yeast exhausts its available food source. Hooch indicates that your culture is hungry and needs feeding. You can pour off the liquid or stir it back into the mixture before discarding and replenishing with fresh flour and water.
Why did my sourdough starter stop rising after day three?
This common plateau happens when early, non-yeast bacteria die off as the mixture acidifies, creating a temporary lull before true wild yeasts take over. Continue your regular 24-hour feeding schedule with unbleached flour and warm water; active fermentation typically resumes within two to four days.
How much starter should I discard at each feeding?
Standard maintenance requires discarding roughly half to three-quarters of the total jar mass, leaving 20 to 50 grams of seed culture. Retaining too much old starter without increasing the flour and water proportionally causes underfeeding, rapidly acidifying the culture and starving the yeast.
Can I revive a sourdough starter that has been in the fridge for a month?
Yes. Established starters are remarkably resilient. Remove the jar from the refrigerator, pour off any accumulated hooch, and feed the culture with equal parts fresh flour and warm water at a 1:2:2 ratio. It usually returns to peak rising vigor within two to four regular feeding cycles.
Amazon links are affiliate links; we may earn a commission at no cost to you.
Shortlists in this category
Ranked lists from our bread baking equipment reviews, limited to listings whose titles confirm the product type, with budget cuts where enough recorded prices sit on both sides of the line.
This page summarizes our research reviews of Amazon listings, listed specifications and captured buyer ratings. It is not a hands-on test. Scores are editorial assessments, not measured performance; prices are recorded snapshots and may change. A category can include both main products and accessories, so its overall price range is not the cost of a complete setup.
Most recent product record update: October 3, 2026. Individual records may be older; this is not a verification date for every claim. Prices on this page were read from the listings Nov 8, 2026 – Nov 10, 2026.
Choose the product type first. These groups require a match in the listing title; an import search term alone is not enough. Scores rank our recorded research assessments within each group, not independently measured performance.
Values are shown as recorded, without unit conversions or inferred compatibility. Not recorded means unknown, not absent. Prices are snapshots, not current offers. Editorial scores are research judgments, not lab results. Amazon links are affiliate links.
Check the manufacturer's dough capacity and duty-cycle guidance; bowl-lift versus tilt-head design alone does not establish capability.
For a covered baking vessel, compare heat retention, lid fit and safe oven temperature; loaf results also depend on dough and baking technique.
A 0.1 g scale makes starter ratios repeatable.
If a specification, certification or compatibility detail is absent, mark it as unknown and ask the seller or manufacturer. Do not substitute a star rating, an editorial score or a different model's specification.