How to Feed Sourdough Starter: Precise Methods for Success
Master your sourdough starter maintenance with essential tools and accurate ratios to ensure consistent, vigorous fermentation for every artisan loaf.
By the Niche Picks editorsUpdated November 8, 20269 min readDrawn from our 32 research-based bread baking equipment reviews
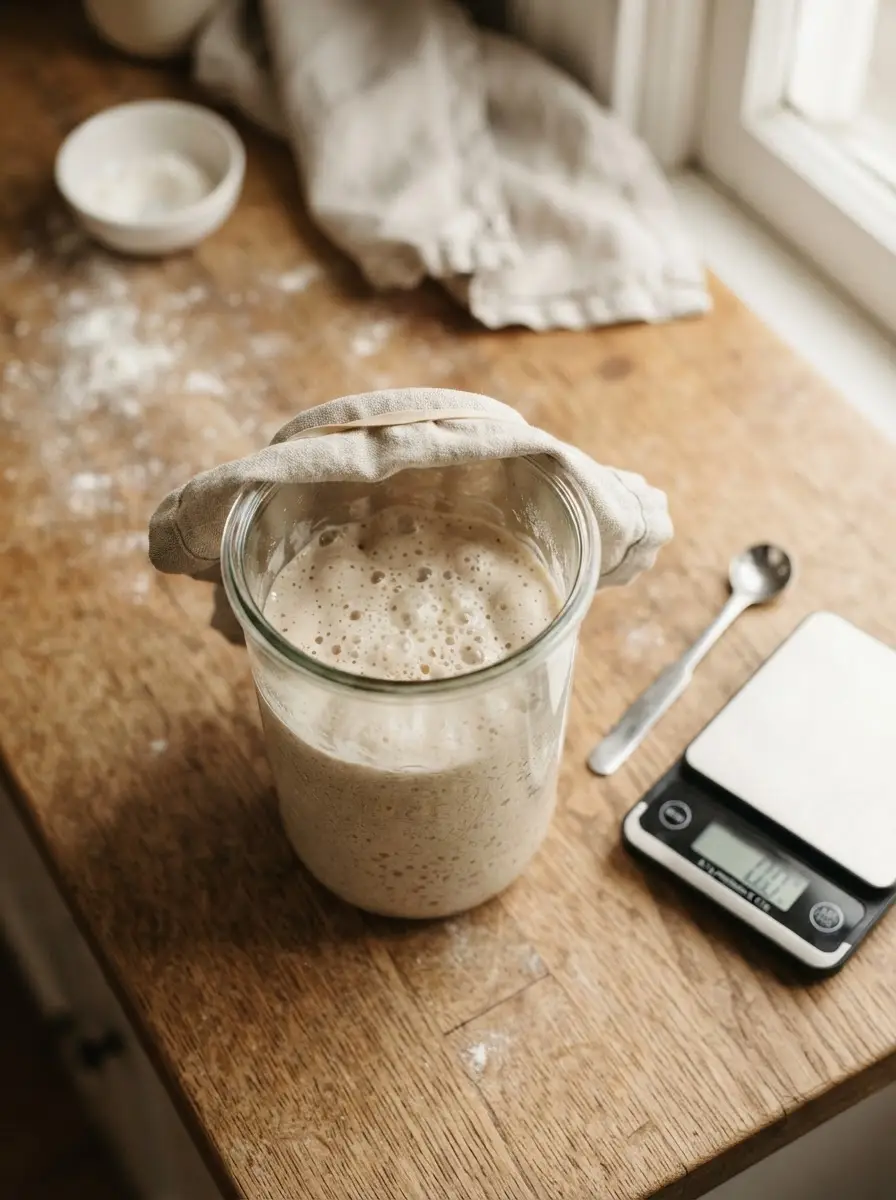
AI-generated editorial illustration; not a product or test photograph.
Short answer
To feed your sourdough starter, use a 0.1g digital scale to combine a set portion of mature starter with equal parts fresh flour and filtered water by weight. Stir until no dry flour remains, then cover and ferment in a warm spot. This precise method ensures your yeast culture remains stable and predictable.
5
Product listings discussed; not hands-on tests
5/5
Discussed listings with a recorded price
$18.99–$49.99
Recorded listing price range; not a complete setup cost
Key takeaways
Precision is vital; a 0.1g scale ensures your starter ratios remain repeatable for consistent dough performance.
Feeding frequency should adapt to your kitchen's ambient temperature and your planned baking schedule.
Maintain a smaller master culture to reduce flour waste while ensuring you have enough for your specific recipe.
Using glass containers allows you to visually monitor fermentation activity and gas production easily.
Consistent refreshment of your culture prevents acidity buildup and ensures long-term microbial health.
Products discussed in this article
Editorial scores and recorded prices are reference points, not measurements of suitability for every use. Read each review's specifications and limitations.
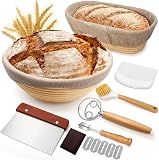
Sourdough Proofing Basket Gift Set, 9" Round and 10"$26.99
Nuovva Enamelled Cast Iron Dutch Oven Pot with Lid-6.4$49.99
Enameled Cast Iron Dutch Oven - Umite Chef 5QT Pot$45.99
Recommended tools for precise sourdough maintenance
Product
Key Feature
Function
Best For
Etekcity 0.1g Scale
0.1g precision
Ingredient weighing
Repeatable starter ratios
Superbaking Banneton
Rattan construction
Proofing
Round boules
EWFEN Gift Set
Multi-shape set
Shaping & scoring
Boules and batards
Nuovva Dutch Oven
6.4 qt capacity
Steam trapping
Large artisan loaves
Umite Chef Oven
500°F rating
Heat retention
Budget-conscious baking
The Role of Precision in Starter Maintenance
Baking is a process governed by ratios, and nowhere is this more critical than in the management of your wild yeast culture. When you feed a starter, you are conducting a controlled inoculation. Using an accurate 0.1g digital scale allows you to maintain exact ratios of flour, water, and seed culture. Without this sub-gram precision, your starter may experience inconsistent fermentation rates, which often leads to weak oven spring or unpredictable crumb structures in your final loaf. Standard kitchen scales, which often default to 1-gram increments, lack the resolution required to measure small seed cultures or micro-feedings accurately.
Precise measurements eliminate the arithmetic errors common in volumetric (cup-based) feeding.
A 0.1g resolution allows you to scale your starter build exactly to your recipe's needs.
Consistent inputs facilitate a predictable peak time, helping you align your baking schedule with your life.
Professional artisan bakers rely on these metrics to maintain stability across their levains. By keeping your feeding ratios consistent—typically using a 1:1:1 or 1:2:2 ratio—you ensure that the yeast population remains healthy and active. This consistency is the foundation of high-quality bread, separating accidental successes from deliberate mastery. If you are struggling with your fermentation, our faq on bread baking explores these foundational issues in greater detail, ensuring your tools help you achieve the results you desire without guesswork.
Selecting the Right Feeding Vessel
Your choice of container is more than just a storage solution; it is an active participant in the fermentation environment. A clean, non-reactive glass jar is the standard choice because it allows you to observe bubble formation and volume increase, which are the primary indicators of a healthy, active culture. As you feed your starter, keep in mind that a vibrant culture can double or triple in volume. Using a vessel that is too small for your starter leads to messy overflows that can contaminate your workspace or, worse, ruin the seal on your lid. When you transition to Dutch ovens for your bake, you will appreciate the habit of using high-quality, clean equipment across every step of the process.
Straight-sided jars make it easy to mark the starter level and track growth progress.
Wide-mouth designs facilitate easier stirring and cleaning, reducing the risk of old starter buildup.
Always use a lid that can vent CO2, preventing pressure buildup during active phases.
Periodically transfer your starter to a fresh, sanitized container to prevent mold or crusty debris from forming on the rim.
Maintaining a clean environment for your wild yeast is essential to its long-term viability. While the natural acidity of a healthy starter serves as a defensive barrier against unwanted pathogens, crusty buildup in the corners of a jar can harbor mold. By establishing a routine of using clean equipment, you ensure that your yeast remains the dominant culture. For those who want to compare different tools, we invite you to read tips on bread baking to see how professionals structure their prep stations. If you are planning to expand your collection, remember that durable tools last years when cared for properly.
Temperature Control
Warmer temperatures significantly accelerate fermentation. If your kitchen is hot, check your starter more frequently to prevent over-fermentation.
Managing Volume and Waste
A common mistake in bread baking is maintaining a massive, gallon-sized jar of starter that requires significant quantities of flour to feed every day. For the average home baker, this is unnecessary and financially inefficient. You only need a small amount of active culture to inoculate your dough. By maintaining a smaller master culture, you minimize resource consumption and keep your feeding schedule manageable. If you find yourself with excess discard, consider it a resource rather than waste—it can be used in various recipes. As you scale up your production, you might consider investing in proofing baskets such as those found in the banneton set, which help manage your final dough with the same level of care as your starter.
Feed only enough to satisfy your upcoming bake plus a small amount to preserve your starter for the next cycle.
If you bake infrequently, store your starter in the refrigerator to slow down its metabolism.
Bringing a cold starter to room temperature and feeding it consistently for 2-3 days will restore full activity.
Use a rubber band on your jar to track exactly how far your starter rises between feedings.
Managing the fermentation environment is about finding a balance that suits your lifestyle. You do not need a laboratory, but you do need a system that keeps the yeast fed and ready for use. Whether you prefer white bread flour for a milder, classic profile or whole grain additions for a deeper, more complex flavor, the act of feeding is your primary way to influence the character of your bread. With a structured approach and proper tools, you turn the complex science of wild yeast into a simple, daily ritual that rewards you with better texture, better crust, and consistent quality.
Temperature and Fermentation Velocity
Temperature is the single most influential variable in the speed of your starter's development. Wild yeast and lactic acid bacteria are sensitive to thermal changes, meaning your feeding schedule should be adjusted according to your kitchen environment. A warmer kitchen causes your starter to ferment rapidly, potentially reaching its peak activity in a fraction of the time compared to a cool kitchen. If your cast iron Dutch oven is preheating, you are already thinking about thermal mass in your baking; apply that same logic to your starter. Keeping your starter in a consistent, draft-free area ensures that you can predict when it will reach peak activity.
Warm environments accelerate fermentation; be prepared to feed more often or adjust your ratios.
Cool environments prolong the fermentation process, which can lead to a more complex, sour flavor profile.
Never place your starter near direct heat sources, which can kill the culture.
Use a thermometer if your kitchen temperature fluctuates wildly throughout the seasons.
Because heat influences metabolic rate, you should watch your starter rather than just relying on a timer. When it reaches the stage of peak activity—usually marked by a high volume, a domed surface, and visible activity throughout the jar—it is primed for use. If you are using a 7QT cast iron pot for your final bake, ensure that your starter's peak cycle coincides with your mixing time. Consistency here is the difference between a loaf that blooms perfectly and one that fails to rise. If you ever feel uncertain, refer to our bread baking buyer's guide to confirm that your current methods align with established best practices. Always prioritize the health of the culture by avoiding sudden temperature shocks.
Avoid Cross-Contamination
Always use a dedicated spoon for your starter. Residue from other kitchen prep can introduce unwanted microbes that compete with your yeast.
The Importance of Flour Selection
The flour you use to feed your starter is its primary source of fuel. While white bread flour is an excellent, neutral-tasting baseline for most bakers, it is not the only option. Incorporating different flours like whole wheat, rye, or spelt can add vital nutrients and enzymes to your starter, making it more vigorous and resilient. These flours contain a higher concentration of the minerals and proteins that yeast thrives on, which can result in a more active and complex culture. If you find your starter is sluggish, switching to a blend of white and whole wheat flour for a few feedings can often revitalize it.
High-protein bread flour helps maintain strong cell structure in the starter during fermentation.
Whole wheat and rye flours increase the microbial diversity and overall health of the starter.
Chlorine in tap water can sometimes hinder sensitive cultures; use filtered water to ensure optimal conditions.
Always rotate your flour supplies to ensure freshness, as old flour can lose the nutrients yeast requires.
As your starter evolves, you will notice that it takes on the characteristics of its environment and the flour you provide. Some bakers maintain two separate starters: one fed with white flour for a delicate crumb and another with dark rye for a robust, tangy sourdough experience. Whatever path you choose, the consistency of your flour brand and type remains important. By keeping your inputs stable, you reduce the variables that lead to failure. Remember, the starter is a living system; it responds to how you treat it. When you combine high-quality flour with the precise tools discussed, you create a professional-grade environment at home. Check our general bread baking blog for more insights on building flavor through ingredient selection.
Troubleshooting Common Starter Issues
Even with the best equipment, your starter may occasionally behave unexpectedly. A sluggish starter that refuses to rise is the most common problem, typically stemming from either infrequent feeding or environmental stress. If you notice a thin layer of liquid forming on the top—known as 'hooch'—your starter is likely hungry and needs more frequent feedings. Do not be discouraged; this is a normal sign of a living culture. By using a 9-inch banneton set to support your final loaves, you are likely already committed to the craft, so stay the course with your starter. The most effective remedy is a series of refreshed feedings at 12-hour intervals until the starter regains its predictable rise and fall.
Liquid on top (hooch) is a sign of alcohol byproduct; feed the starter sooner next time.
A lack of bubbles could indicate the temperature is too low or the water quality is poor.
If the starter smells overly harsh or vinegary, move to a more frequent feeding schedule to stabilize the bacteria.
If you are ever concerned about the safety of your starter, discard and begin again—a healthy starter should have a clean, yeasty, or slightly fruity aroma.
Maintaining a sourdough culture is a long-term practice that rewards patience. Do not overthink the process or get distracted by anecdotal advice that contradicts the basic science of wild yeast. Stick to your weights, monitor your temperatures, and keep your containers clean. If you find that your bread is not achieving the results you want, revisit the basics. Our bread baking FAQ is an excellent resource for clarifying the difference between environmental factors and genuine starter failure. Your commitment to these fundamentals will ensure your starter remains a lifelong partner in your baking journey, providing the leavening power needed for thousands of delicious loaves.
Step by step
1Discard a portion of your existing starter to manage volume.
2Place your clean container on the scale and tare it to zero.
3Add the reserved seed starter to the container.
4Add the required weight of fresh flour to the container.
5Add the required weight of filtered water.
6Stir vigorously until the mixture is uniform and free of dry pockets.
7Scrape down the inner walls of the jar to prevent crusting.
8Cover loosely and allow to ferment in a stable, warm environment.
Quick checklist
Weigh your empty starter jar to account for tare weight.
Use a 0.1g scale to weigh starter, flour, and water precisely.
Mix thoroughly to ensure full hydration of all flour particles.
Mark your starting jar level using a rubber band.
Place the jar in a consistent, warm location away from drafts.
Observe the starter until it reaches its peak volume before using.
Frequently asked questions
How often do I need to feed my sourdough starter?
If kept at room temperature, feed it once every 24 hours to maintain peak activity. If stored in the refrigerator, once a week is sufficient, but you must bring it to room temperature and feed it consistently for several days before baking to restore its strength.
Can I use a standard kitchen scale for feeding?
Standard scales often have 1-gram increments, which are insufficient for feeding smaller seed cultures. A 0.1g scale is necessary for the precision required in sourdough maintenance, especially for bakers using small, waste-efficient feeding ratios.
What happens if I forget to feed my starter?
If forgotten, your starter may develop a layer of liquid on top and become highly acidic. Simply discard the excess, perform a fresh feeding, and wait for it to recover. It usually takes two to three consistent feedings to restore full activity.
Why is my starter not bubbling?
A lack of bubbles usually indicates insufficient yeast activity. This is often caused by cold temperatures or infrequent feeding. Ensure your environment is warm and your feeding schedule is consistent, and verify you are using unchlorinated water.
Should I feed my starter with white or whole wheat flour?
Both are effective. White bread flour offers a consistent, mild flavor, while whole wheat or rye flours contain more nutrients that can make a starter more vigorous. Many bakers use a blend to balance flavor and activity levels.
Amazon links are affiliate links; we may earn a commission at no cost to you.
Shortlists in this category
Ranked lists from our bread baking equipment reviews, limited to listings whose titles confirm the product type, with budget cuts where enough recorded prices sit on both sides of the line.
This page summarizes our research reviews of Amazon listings, listed specifications and captured buyer ratings. It is not a hands-on test. Scores are editorial assessments, not measured performance; prices are recorded snapshots and may change. A category can include both main products and accessories, so its overall price range is not the cost of a complete setup.
Most recent product record update: September 16, 2026. Individual records may be older; this is not a verification date for every claim. Prices on this page were read from the listings Nov 8, 2026 – Nov 10, 2026.
Choose the product type first. These groups require a match in the listing title; an import search term alone is not enough. Scores rank our recorded research assessments within each group, not independently measured performance.
Values are shown as recorded, without unit conversions or inferred compatibility. Not recorded means unknown, not absent. Prices are snapshots, not current offers. Editorial scores are research judgments, not lab results. Amazon links are affiliate links.
Before treating a comparison as complete
Which details are still unknown?
A specification appearing in a listing is not independent verification. These counts show which shortlisted records contain the same field; a blank record does not mean the product lacks the feature.
Capacity
Recorded for 2 of 2 shortlisted models
Present in every shortlisted record. Check units, exact variants and the current manufacturer documentation before relying on it.
Item Dimensions
Recorded for 2 of 2 shortlisted models
Present in every shortlisted record. Check units, exact variants and the current manufacturer documentation before relying on it.
Item Dimensions W x H
Recorded for 2 of 2 shortlisted models
Present in every shortlisted record. Check units, exact variants and the current manufacturer documentation before relying on it.
Item Weight
Recorded for 2 of 2 shortlisted models
Present in every shortlisted record. Check units, exact variants and the current manufacturer documentation before relying on it.
Lid Material
Recorded for 2 of 2 shortlisted models
Present in every shortlisted record. Check units, exact variants and the current manufacturer documentation before relying on it.
Material
Recorded for 2 of 2 shortlisted models
Present in every shortlisted record. Check units, exact variants and the current manufacturer documentation before relying on it.
Values are shown as recorded, without unit conversions or inferred compatibility. Not recorded means unknown, not absent. Prices are snapshots, not current offers. Editorial scores are research judgments, not lab results. Amazon links are affiliate links.
Check the manufacturer's dough capacity and duty-cycle guidance; bowl-lift versus tilt-head design alone does not establish capability.
For a covered baking vessel, compare heat retention, lid fit and safe oven temperature; loaf results also depend on dough and baking technique.
A 0.1 g scale makes starter ratios repeatable.
If a specification, certification or compatibility detail is absent, mark it as unknown and ask the seller or manufacturer. Do not substitute a star rating, an editorial score or a different model's specification.