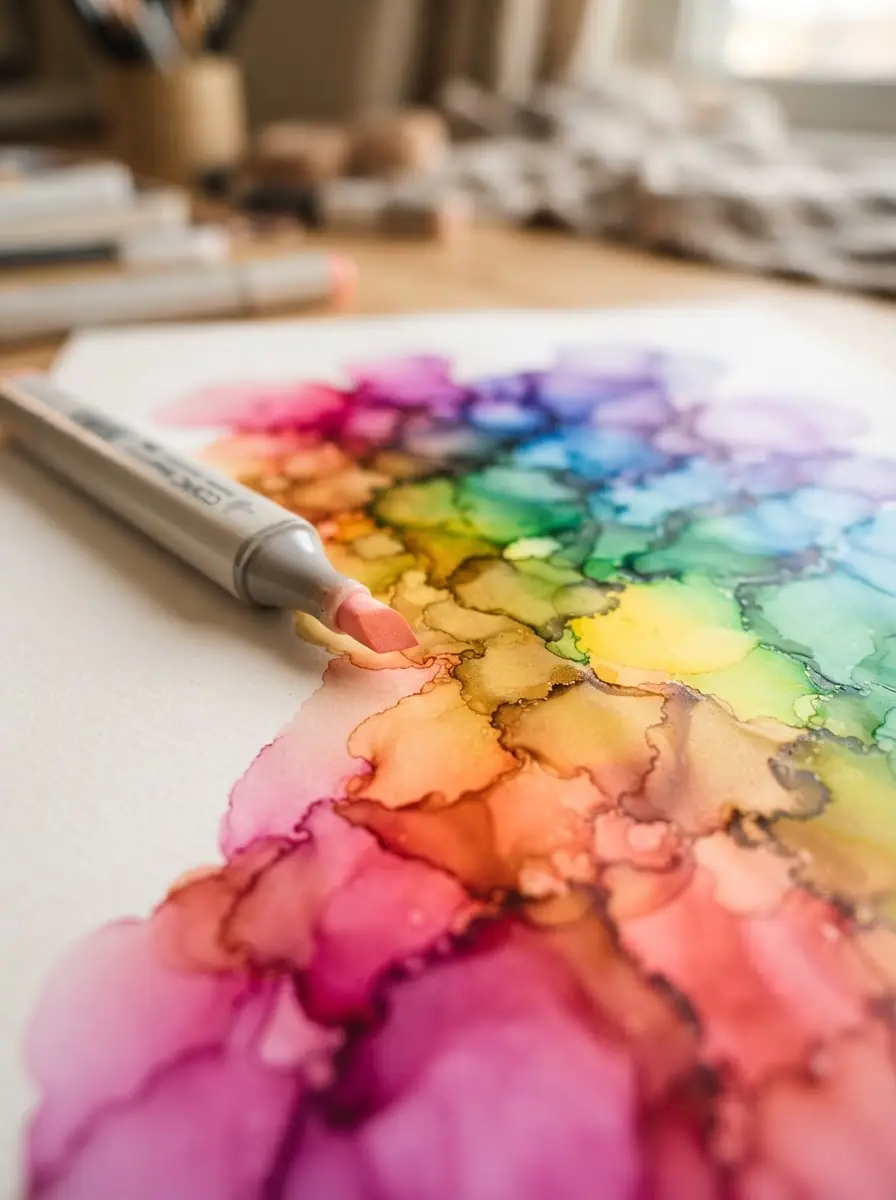
Learn professional techniques for seamless gradients and soft color transitions using alcohol-based markers and the correct paper surfaces.
By the Niche Picks editorsUpdated November 9, 20268 min readDrawn from our 30 research-based art supplies & tablets reviews
AI-generated editorial illustration; not a product or test photograph.
Short answer
Blending alcohol markers requires working while the ink is still wet to allow solvents to move pigment across the fibers. Apply your base color, add a darker value while the first layer remains damp, and use a colorless blender or a lighter marker to soften the transition edges. Always use high-quality marker paper to ensure even ink flow and prevent streaking.
3
Product listings discussed; not hands-on tests
3/3
Discussed listings with a recorded price
$22.99–$39.99
Recorded listing price range; not a complete setup cost
Key takeaways
Work quickly while the ink is wet to prevent the solvent from drying and creating harsh streak lines.
Choose thick, bleed-proof marker paper exceeding 300 gsm to manage high ink saturation without buckling.
Use a colorless blender pen to push pigment into adjacent areas for smooth gradients and highlights.
Practice layering from light to dark values to maintain better control over color intensity and saturation.
Avoid standard office paper, as it absorbs ink too rapidly and causes excessive feathering and bleeding.
Products discussed in this article
Editorial scores and recorded prices are reference points, not measurements of suitability for every use. Read each review's specifications and limitations.
The secret to successful marker blending lies less in the brand of the pen and more in the substrate you choose. Alcohol-based inks are highly fluid and designed to saturate fibers rapidly. If you attempt to blend on standard printer or copy paper, the solvent will soak through the bottom of the page, causing significant bleed-through and lateral feathering. This prevents you from controlling the pigment flow and leads to a muddy, patchy aesthetic. To achieve professional results, we recommend using dedicated bleed-proof marker paper or heavy media weighing at least 300 gsm. These specialized surfaces are engineered to hold the ink on the surface long enough for you to manipulate the colors before they dry. As discussed in our guide/art-supplies-tablets, low-quality paper is one of the most common mistakes/art-supplies-tablets that beginners make when transitioning from digital to physical media. Even durable options like the product/B002NQ2K16 are better suited for dry media; for wet alcohol-based work, you must specifically seek out articles/what-sketchbook-paper-is-best-for-alcohol-markers to ensure your sketches stay crisp and vibrant.
Use dedicated marker pads for the best results.
Avoid standard thin sketchbook sheets under 100 gsm.
Use a silicone barrier sheet behind your page to protect the next sheet from bleed-through.
Ensure your workspace is clean, as alcohol ink can react with dust or debris on the page.
The primary technique for blending is 'wet-in-wet' application. By laying down a lighter color first, you saturate the paper fibers with solvent. Before this layer dries, apply your darker color to the edges you want to transition. The alcohol solvent in the second marker will reactivate the first layer, allowing the pigments to physically migrate into one another. Because alcohol inks dry very quickly, speed is essential. With tools like the product/B073TW8QHV, you will notice that the solvent evaporates almost instantly. If you work too slowly, you will inevitably create 'streak lines' where the ink has already set. If you find yourself struggling with this, consider experimenting with the product/B01H1NV1RE, which is often praised for its consistent ink flow. For a deeper look at budget-friendly options, check our notes on articles/ohuhu-alcohol-markers. Remember that the goal is not to force the colors to mix through scrubbing, which can damage the paper fibers and cause pilling. Instead, let the capillary action of the ink do the heavy lifting. If the transition remains harsh, use a colorless blender pen—a marker filled only with the solvent vehicle—to re-wet the area and push the pigment toward the lighter sections, creating a seamless gradient.
Alcohol ink evaporates quickly. Keep your colors ready and plan your transitions before you start to avoid harsh, dry edges.
Choosing the right nib for your blending style
Marker tip geometry plays a major role in how you apply and blend ink. Most sets, such as the product/B0GVJBS69H, come with a dual-tip design featuring both a chisel and a fine bullet nib. The chisel tip is your best friend for covering large areas, as it allows you to lay down a wide, uniform patch of ink quickly, which is essential for maintaining the wet-edge necessary for blending. The fine or brush tips are better reserved for refining edges, adding detail, or saturating tight corners where the chisel would be too blunt. If you prefer a more expressive, calligraphic approach, look for sets with flexible brush nibs. These tips are gentler on paper surfaces and allow for finer control over pressure-sensitive line weight, which can make a significant difference when trying to blend colors in an organic shape. However, be mindful that lower-cost sets often lack the mechanical uniformity of professional-grade tools. If you are starting, consistent nib quality is more valuable than having a massive range of colors. Our category/art-supplies-tablets overview can help you identify sets that offer the best balance between nib durability and ink performance for your specific artistic goals.
Layering is the process of adding multiple passes of the same color to deepen its value. Because alcohol markers are transparent, layering allows you to build depth and saturation without the opacity of paints. Start with your lightest color, then go over the areas you want to darken with the same marker or a slightly darker value. Avoid the temptation to use too many colors at once; blending three to four colors is usually the maximum for most paper stocks before the fibers become saturated and the ink begins to look patchy. If you are working on a piece that you want to preserve, remember that dye-based alcohol markers are generally not archival. They will fade under intense UV light over time. If your priority is long-term display, you may want to look into professional-grade materials or digitize your work using a tablet. For those interested in digital workflows, articles/best-budget-drawing-tablet-with-screen-for-beginner-artists offers great alternatives to traditional marker illustration. By mastering the saturation on paper first, you gain a foundational understanding of color transitions that translates seamlessly to digital painting programs where you can mimic these blending effects through layer opacity and brush settings.
Mind the Bleed
Alcohol markers are meant to penetrate paper. Always place a thick, non-porous mat or a scrap piece of cardstock under your working sheet to prevent permanent damage to your desk.
Maintenance and storage tips
Proper maintenance is essential to keep your markers in top condition for blending. Because the solvent is volatile, evaporation is the primary enemy of these tools. Always ensure the cap clicks shut firmly after every use. A loose cap can dry out a nib in a matter of hours, making it impossible to achieve a smooth blend during your next session. We also recommend storing your markers horizontally. If stored vertically, the ink will gravity-pool at one end of the reservoir, leading to inconsistent flow from one tip and potentially causing the other tip to run dry prematurely. If you notice a marker isn't blending well, it might be due to a clogged or frayed nib. While many budget sets have non-replaceable nibs, you can sometimes gently clean a tip with a bit of the colorless blender or, in extreme cases, trim a slightly frayed edge to regain precision. However, prevent the need for this by using light, fluid strokes rather than pressing down hard into the paper. Always remember that your markers are tools for sketching; keep your supplies organized to ensure you can find the right values quickly while the ink is still wet on your paper. For further guidance on optimizing your studio setup, visit our blog/art-supplies-tablets for more tips on organizing your art space.
Finalizing your artwork
Once you have finished your blending, give the ink a moment to fully dry and set into the paper fibers. Alcohol ink dries waterproof, which is a significant advantage for mixed-media artists. Once dry, you can safely use pens, colored pencils, or even light paint washes over the top of your marker work without the ink lifting or bleeding. This opens up a world of possibilities for adding sharp highlights, fine-line detailing, or opaque accents. Keep in mind that the final appearance of your work may change slightly as the solvent evaporates—this is normal. If you are unhappy with a transition, you can sometimes lighten an area by applying more colorless blender to 'push' the ink toward the paper's edges, essentially cleaning out some of the pigment. Always take the time to test your blending on a scrap piece of the same paper you are using for your final work. This 'swatching' step is the best way to prevent surprises and ensures you understand how the specific color values in your set interact under your hand. For beginners, consistency is the ultimate goal; by practicing these techniques regularly, you will find that your speed increases and your color transitions become more intuitive, allowing you to focus on the composition of your piece.
Test Your Paper
Standard copy paper will destroy your blends. Always use dedicated, heavy-duty marker paper or smooth bristol board (300 gsm+) to get the best flow.
Step by step
1Apply your base color in a solid, even layer.
2While the base layer is still wet, add your darker color to the edge you want to blend.
3Immediately go back over the transition zone with your base color or a colorless blender.
4Use light, sweeping circular motions to nudge the pigments into each other.
5Repeat the process if necessary, working from light to dark to build up depth.
6Allow the ink to dry completely before applying any secondary media like fineliners or colored pencils.
Quick checklist
Select high-quality, bleed-proof marker paper (300 gsm recommended).
Prepare a scratch sheet for testing color transitions.
Store markers horizontally to maintain even ink distribution.
Practice your blending stroke on a test area to gauge drying speed.
Use a colorless blender to soften edges between color blocks.
Always recap markers tightly to prevent solvent evaporation.
Frequently asked questions
Can I blend alcohol markers on regular printer paper?
No, we strongly advise against it. Regular printer paper is too thin and porous, causing alcohol ink to feather excessively and bleed through to your desk. Use dedicated marker paper or heavy bristol board to ensure the ink stays on the surface, which is critical for smooth blending.
What is a colorless blender pen used for?
A colorless blender contains the same alcohol solvent found in your markers but without pigment. It is used to re-wet dried ink on the paper, allowing you to soften hard edges, push pigment into tighter areas, or create gradients by diluting a color as it spreads.
Why do my alcohol markers look streaky?
Streaking usually happens because the ink is drying too fast before you can blend it, or because your paper is too absorbent. To fix this, try working in smaller sections to ensure the edge remains wet, and make sure you are using a smooth, bleed-proof paper that isn't absorbing the solvent instantly.
Do I need expensive markers to learn how to blend?
Not necessarily. While professional brands offer more consistency and refillability, you can learn the fundamentals of blending using affordable sets. Focus on practicing your technique on the right paper, which will yield better results than using expensive markers on the wrong, thin paper.
Should I store my alcohol markers upright or flat?
Always store alcohol markers horizontally. This keeps the ink centered in the barrel, ensuring that both the chisel and fine tips remain equally saturated. Storing them upright can cause one end to dry out significantly faster than the other, damaging the longevity of the tool.
Amazon links are affiliate links; we may earn a commission at no cost to you.
Shortlists in this category
Ranked lists from our art supplies & tablets reviews, limited to listings whose titles confirm the product type, with budget cuts where enough recorded prices sit on both sides of the line.
This page summarizes our research reviews of Amazon listings, listed specifications and captured buyer ratings. It is not a hands-on test. Scores are editorial assessments, not measured performance; prices are recorded snapshots and may change. A category can include both main products and accessories, so its overall price range is not the cost of a complete setup.
Most recent product record update: September 29, 2026. Individual records may be older; this is not a verification date for every claim. Prices on this page were read from the listings Nov 8, 2026.
Choose the product type first. These groups require a match in the listing title; an import search term alone is not enough. Scores rank our recorded research assessments within each group, not independently measured performance.
Values are shown as recorded, without unit conversions or inferred compatibility. Not recorded means unknown, not absent. Prices are snapshots, not current offers. Editorial scores are research judgments, not lab results. Amazon links are affiliate links.
Before treating a comparison as complete
Which details are still unknown?
A specification appearing in a listing is not independent verification. These counts show which shortlisted records contain the same field; a blank record does not mean the product lacks the feature.
Included Components
Recorded for 2 of 2 shortlisted models
Present in every shortlisted record. Check units, exact variants and the current manufacturer documentation before relying on it.
Item Dimensions
Recorded for 2 of 2 shortlisted models
Present in every shortlisted record. Check units, exact variants and the current manufacturer documentation before relying on it.
Item Weight
Recorded for 2 of 2 shortlisted models
Present in every shortlisted record. Check units, exact variants and the current manufacturer documentation before relying on it.
Age Range Description
Recorded for 2 of 2 shortlisted models
Present in every shortlisted record. Check units, exact variants and the current manufacturer documentation before relying on it.
Marker Type
Recorded for 2 of 2 shortlisted models
Present in every shortlisted record. Check units, exact variants and the current manufacturer documentation before relying on it.
Number of Pieces
Recorded for 2 of 2 shortlisted models
Present in every shortlisted record. Check units, exact variants and the current manufacturer documentation before relying on it.
Pressure levels plateau; parallax and texture are what you feel.
For wet media, check paper sizing, composition and format as well as weight; even heavy paper can buckle depending on water use and stretching.
Lightfastness ratings decide whether work survives a decade.
If a specification, certification or compatibility detail is absent, mark it as unknown and ask the seller or manufacturer. Do not substitute a star rating, an editorial score or a different model's specification.