Achieve restaurant-quality ribeye at home with the right immersion circulator and vacuum sealing technique for perfect edge-to-edge doneness.
By the Niche Picks editorsUpdated November 8, 20269 min readDrawn from our 33 research-based sous vide cooking reviews
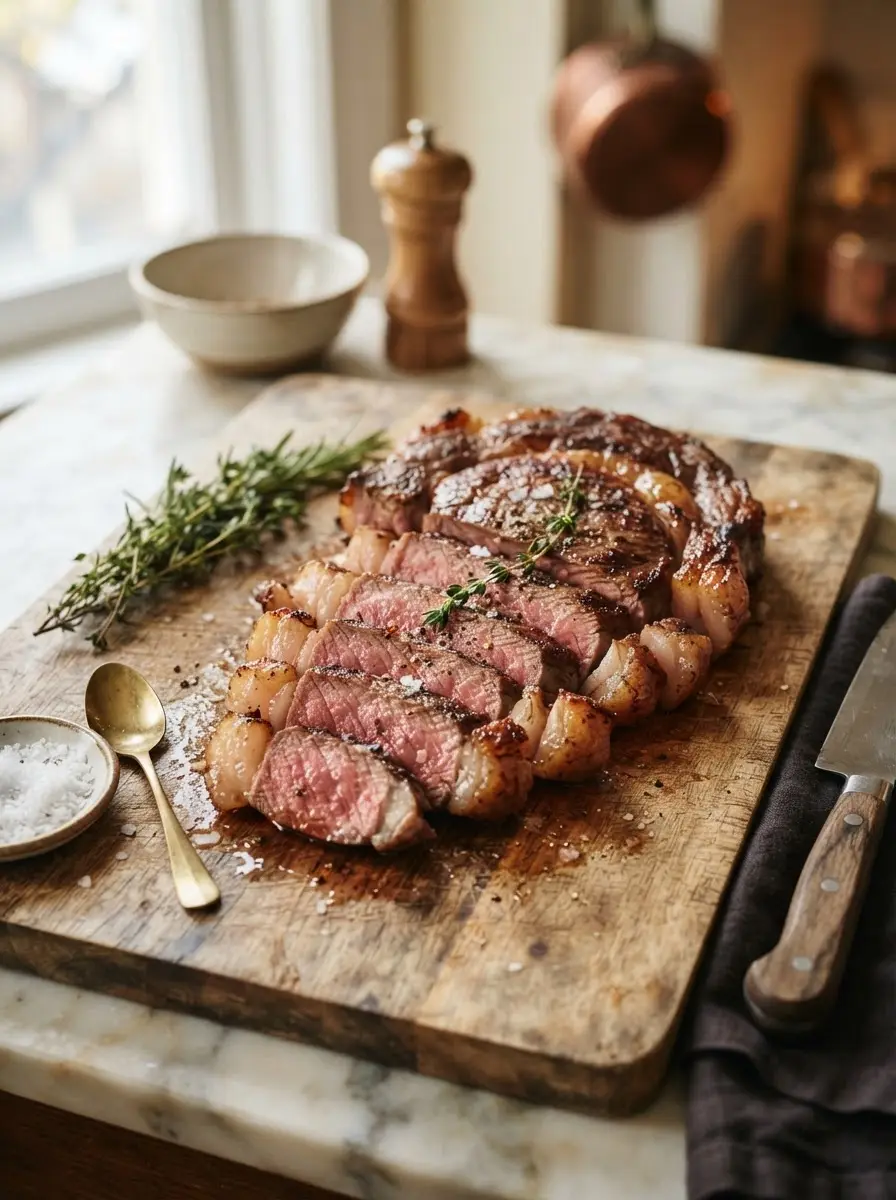
AI-generated editorial illustration; not a product or test photograph.
Short answer
To sous vide a ribeye, vacuum seal the seasoned steak, submerge it in a water bath held at 130°F to 135°F for 1 to 3 hours, and finish with a high-heat sear. This method delivers precise internal results impossible to replicate with traditional grilling or pan-frying techniques.
6
Product listings discussed; not hands-on tests
6/6
Discussed listings with a recorded price
$17.99–$105.99
Recorded listing price range; not a complete setup cost
Key takeaways
Circulator wattage determines how fast your bath reaches the target temperature rather than the consistency of the cook.
Using a container with a fitted lid prevents evaporation and protects your equipment during long-duration sessions.
Edge-style sealers require careful management to avoid drawing liquids into the pump when sealing marinated ribeyes.
Patting the steak surface completely dry after the bath is essential to achieve a superior Maillard reaction during the final sear.
High-heat searing with a torch or cast-iron pan provides the necessary crust without overcooking the perfectly prepared interior.
Products discussed in this article
Editorial scores and recorded prices are reference points, not measurements of suitability for every use. Read each review's specifications and limitations.
FoodSaver Custom Fit Vacuum Sealer Rolls, Airtight$26.99
TBTeek Kitchen Butane Torch with Safety Lock$17.99
Comparison of Recommended Sous Vide Equipment
Product
Wattage
Best Use
Features
Inkbird ISV-100W
1000W
Mid-sized cooks
Wi-Fi, App-ready
EVERIE 12Qt Kit
N/A
Long-term cooks
Hinged lid, Rack
KitchenBoss G300S
1100W
Daily home use
IPX7, Stainless
FoodSaver Rolls
N/A
Custom prep
BPA-free, Textured
Wevac 8x50 Rolls
N/A
Budget prep
Economical bulk
TBTeek Torch
N/A
Searing
2500°F, Adjustable
Essential Hardware for Perfect Steak
Your sous vide journey begins with selecting the correct immersion circulator. We recommend devices with at least 1000 watts, such as the Inkbird ISV-100W or the KitchenBoss G300S, to ensure your water bath ramps up to temperature quickly, minimizing total prep time. While wattage governs heat-up speed, thermal stability depends on the circulator's ability to agitate water effectively throughout the bath. Both models excel at maintaining the 0.1°C accuracy required for professional-grade results, ensuring your ribeye reaches the exact internal doneness you demand.
Beyond the motor, your containment setup dictates long-term success. Using a standard stockpot is possible, but for consistent results, a dedicated system like the EVERIE 12Qt Container Kit is superior. These kits include a fitted, hinged lid that acts as a critical barrier against evaporation. Without a lid, water loss over a three-hour cook can expose the heating element, causing safety-driven shutoffs. The addition of an insulating sleeve helps reduce radiant heat loss, lowering the energy demand on your machine. Our guide on sous vide containers details why these systems are worth the investment compared to improvised setups. When choosing your tools, remember that the goal is to build a thermal environment that remains undisturbed from the moment you drop the protein in until the final timer sounds. This planning mitigates the mistakes to avoid that often occur when beginners use inadequate pots or lack proper covering for their water baths.
Achieving an airtight seal is the primary step in ensuring heat transfer efficiency. Air is a natural insulator, and any trapped bubbles against your ribeye can lead to uneven textures or localized temperature zones. We suggest using reliable FoodSaver Custom Length Rolls or FoodSaver Custom Fit Rolls to tailor pouch dimensions to your specific cuts, significantly reducing plastic waste. When using these textured bags with edge-style sealers, you must maintain a disciplined process regarding moisture. Edge-style units draw air across the bag opening; if your ribeye is heavily marinated or seasoned with wet aromatics, that fluid will be pulled toward the suction path.
As discussed in our sous vide FAQ, you must avoid drawing liquids into the internal pump, as this can lead to machine malfunction. For wet preparations, use the 'Pulse' mode on machines that support it, or simply stop the vacuum cycle the instant liquid approaches the seal bar, finishing with a manual weld. If you are preparing large volumes of ribeye for batch cooking, these rolls allow for consistent, multi-line heat seals that protect the vacuum integrity during the entire submersion period. While commercial-grade chamber sealers handle liquids without any special technique, they are rarely justified for domestic use. Instead, learn the mechanics of your chosen sealer, such as the FoodSaver FM2100, to ensure your ribeye remains hermetically sealed throughout the cook. By treating the vacuum stage with as much care as the temperature selection, you ensure that no water ingress ruins the flavor or texture of your steak, keeping the meat perfectly isolated within its own juices for optimal tenderness.
Always pat your steak dry with a paper towel after removing it from the bag. Surface moisture inhibits searing and leads to soggy crusts.
Mastering Temperature and Time Control
The core advantage of sous vide is the ability to hold a ribeye at the precise temperature where fat renders and muscle fibers soften without overcooking. For a medium-rare ribeye, a target bath temperature between 130°F and 132°F is ideal. Because this process happens at such a low temperature compared to traditional methods, you have a wider window of success. A typical 1.5-inch steak requires roughly 1.5 to 3 hours to achieve the perfect balance of texture and heat. We cover these timing specifics extensively in our article on how long to sous vide a steak.
During this time, the immersion circulator works to keep the bath uniform. As noted earlier, the wattage of your device dictates how quickly you reach this state, not how well it is maintained. Once the temperature is stabilized, your main concern is water level maintenance. The use of a fitted lid is not optional for long cooks—it is the primary way to prevent evaporative loss that can lead to machine burnout or uneven cooking results. When the timer indicates the cook is finished, your steak will look gray and unappealing; do not mistake this for a failed cook. The transformation into a delicious meal occurs in the next step. Understanding the science of heat transfer and how different temperatures affect connective tissue can help you customize the texture of your ribeye, whether you prefer a firmer bite or a more tender, melt-in-your-mouth experience. Always consult our sous vide buying tips to learn how to prepare different cuts of beef properly, ensuring you have the baseline knowledge needed to experiment safely with different temperatures and durations.
Finishing the Ribeye: The Sear
The final phase of the process is the sear. Because the ribeye is already cooked to your desired internal temperature, the heat applied in this step should be intense and brief. Excessive searing will heat the center past your target, negating the benefits of the sous vide bath. Before starting, pat the exterior of the steak bone-dry with paper towels. Surface moisture creates steam in a hot pan, which hinders the Maillard reaction—the chemical process responsible for that delicious, brown crust.
For localized browning and finishing delicate edges, a tool like the TBTeek butane torch provides excellent control. Torches allow you to caramelize the steak surface without creating a messy grease splash on your stove. However, for a uniform crust across the entire surface area of a large ribeye, a scorching hot cast-iron skillet is often more efficient. If you choose the skillet, use an oil with a high smoke point and sear for no more than 60 seconds per side. The goal is only to create a flavorful, caramelized surface; the internal work is already complete.
If you are juggling multiple steaks, consider that a torch might require more time per steak compared to a hot pan, but it offers better maneuverability. Always practice safety by ensuring your workspace is free of flammable items and that you are working in a well-ventilated area, especially when searing with high-intensity heat. Mastering the transition from the water bath to the heat source is the true hallmark of an accomplished home chef. Once finished, the ribeye is ready to slice and serve immediately, as the long, gentle cook means there is typically no need for the extended resting periods required by conventionally grilled or roasted steaks, allowing you to move directly from the sear to the plate.
If using an edge-style sealer, never draw loose liquids into the pump. Stop the vacuum cycle manually once liquid reaches the seal bar.
Sous Vide Safety and Maintenance
Safety in the kitchen extends to how you maintain your sous vide setup. Most modern immersion circulators, like the Inkbird ISV-100W or the KitchenBoss G300S, feature IPX7 waterproofing, which protects internal components from accidental spills or steam. However, proper care after a cook is vital. Hard water deposits can accumulate on the heating element, which reduces the machine's efficiency over time and can lead to inaccurate temperature readings. Regularly cleaning the removable stainless steel skirt of your circulator in a mixture of water and food-safe descaling liquid will prevent buildup and keep the impeller moving smoothly.
Furthermore, when conducting multi-day cooks, ensure your container and lid are kept in a sanitary environment. Polycarbonate containers, like the EVERIE system, are excellent because they are durable, easy to wash, and NSF-certified for safety. Always verify that your power source matches the circulator's requirements; check the voltage specifications on your unit to avoid hardware damage. Proper maintenance also includes monitoring your bags for seal integrity. If you notice any bubbles or bag movement during the cook, it may indicate a seal failure or gas buildup. In such cases, immediately re-bag the item and reset the timing.
Finally, keep your budget planner updated for consumables. Vacuum bags, particularly when bought in large packs like the Wevac 100-count pint bags, are the most frequent recurring expense. By purchasing in bulk and utilizing reusable bags where appropriate, you reduce the per-cook cost significantly. These habits protect your investment in high-end culinary hardware while ensuring that every meal prepared is safe and consistent. Remember to review our guide on what is sous vide cooking and how to start to refresh your memory on standard safety thresholds for time and temperature, which remain the foundation of successful and safe home immersion cooking.
When building your setup, you will inevitably encounter different paths: high-powered professional circulators versus budget-friendly options, or custom container kits versus improvised stockpots. High-wattage units like the Anova Precision Cooker Pro provide the quickest ramp-up times, which is beneficial if you frequently host dinner parties and need to handle large bath volumes. However, for the typical two-to-four-person dinner, a 1000W unit is more than sufficient. The extra cost of the Pro model focuses on heavy-duty construction and duty-cycle longevity, which may not be required for occasional home use.
Similarly, vacuum sealing choices range from simple manual handheld devices to large-scale edge sealers. If you have a small kitchen space, a compact vertical sealer can save valuable counter real estate without sacrificing the quality of the vacuum pull. The main trade-off in the vacuum sealer market is functionality versus size; larger units often offer double-seal capabilities or faster cycle times, whereas compact units are designed for convenience and storage. Regardless of the machine chosen, the critical factor remains the interaction between the bag's textured surface and the machine's sealing bar. Always use high-quality textured bags to ensure reliable air removal.
Ultimately, the 'best' setup is one that you will use consistently. If the system is too cumbersome to set up, it will stay in the drawer. Selecting a 12-quart container setup, such as the homenote package, provides a turnkey solution that includes a rack and sleeve, removing the guesswork from assembly. We suggest using our comparison tool to weigh the pros and cons of these bundles against individual components. As you refine your technique, you will find that a consistent workflow—using the same container, bags, and circulator—leads to the most predictable and repeatable results. Focus your investment on the circulator and the container's lid, as these are the two components that directly impact the precision and success of your cooking session, rather than overspending on non-essential accessories that do not improve the final quality of your ribeye.
1Season your ribeye steak thoroughly with salt and aromatics.
2Seal the steak in a vacuum bag, ensuring a tight fit without drawing liquid into the seal bar.
3Fill your water bath and bring it to 130°F to 135°F, depending on your preferred doneness.
4Submerge the bag and secure it to the side of the container with a clip.
5Cook for 1.5 to 3 hours, ensuring the circulator is covered with a lid.
6Remove the steak, pat it completely dry, and sear for 60 seconds per side over high heat.
Quick checklist
Select a high-wattage immersion circulator (1000W+)
Prepare a stable, food-safe 12-quart container
Use a fitted lid to prevent water evaporation
Select quality embossed vacuum bags
Season the ribeye generously before bagging
Pat the steak surface dry after the bath
Finish with a high-heat sear (torch or pan)
Frequently asked questions
Can I sous vide a ribeye steak without a vacuum sealer?
Yes. Use the water displacement method by placing the steak in a high-quality freezer-safe zip-top bag and slowly lowering it into the water to push air out, sealing just before the bag opening enters the water.
How long can I leave a ribeye in the sous vide bath?
For optimal texture, 1 to 3 hours is best. Leaving it longer than 4 hours can cause the muscle structure to break down too much, resulting in an overly soft, mushy texture.
Does higher wattage make the ribeye cook better?
Higher wattage only decreases the preheat time. Once the water hits the set temperature, the quality of the cook is entirely dependent on the stability of the circulator's thermal sensor and water flow.
What is the best temperature for a medium-rare ribeye?
For a perfect medium-rare, aim for 130°F to 132°F. This range ensures the fat renders properly while keeping the lean meat tender and juicy throughout the entire cut.
Can I put a cold steak directly into the bath?
Yes. Simply account for the temperature difference by increasing your cooking time by 30 to 60 minutes to ensure the core of the steak reaches the target bath temperature evenly.
Amazon links are affiliate links; we may earn a commission at no cost to you.
Shortlists in this category
Ranked lists from our sous vide cooking reviews, limited to listings whose titles confirm the product type, with budget cuts where enough recorded prices sit on both sides of the line.
This page summarizes our research reviews of Amazon listings, listed specifications and captured buyer ratings. It is not a hands-on test. Scores are editorial assessments, not measured performance; prices are recorded snapshots and may change. A category can include both main products and accessories, so its overall price range is not the cost of a complete setup.
Most recent product record update: October 3, 2026. Individual records may be older; this is not a verification date for every claim. Prices on this page were read from the listings Nov 8, 2026 – Nov 12, 2026.
Choose the product type first. These groups require a match in the listing title; an import search term alone is not enough. Scores rank our recorded research assessments within each group, not independently measured performance.
Wattage sets how fast you come to temp, not how well you hold it.
Chamber sealers generally handle liquids more easily; for edge sealers, follow the model's instructions and avoid drawing liquid into the pump.
A fitted lid cuts evaporation on long cooks.
If a specification, certification or compatibility detail is absent, mark it as unknown and ask the seller or manufacturer. Do not substitute a star rating, an editorial score or a different model's specification.