Learn how to safely and effectively cook frozen steak directly in your sous vide bath without compromising on texture, flavor, or food safety.
By the Niche Picks editorsUpdated November 9, 202610 min readDrawn from our 33 research-based sous vide cooking reviews
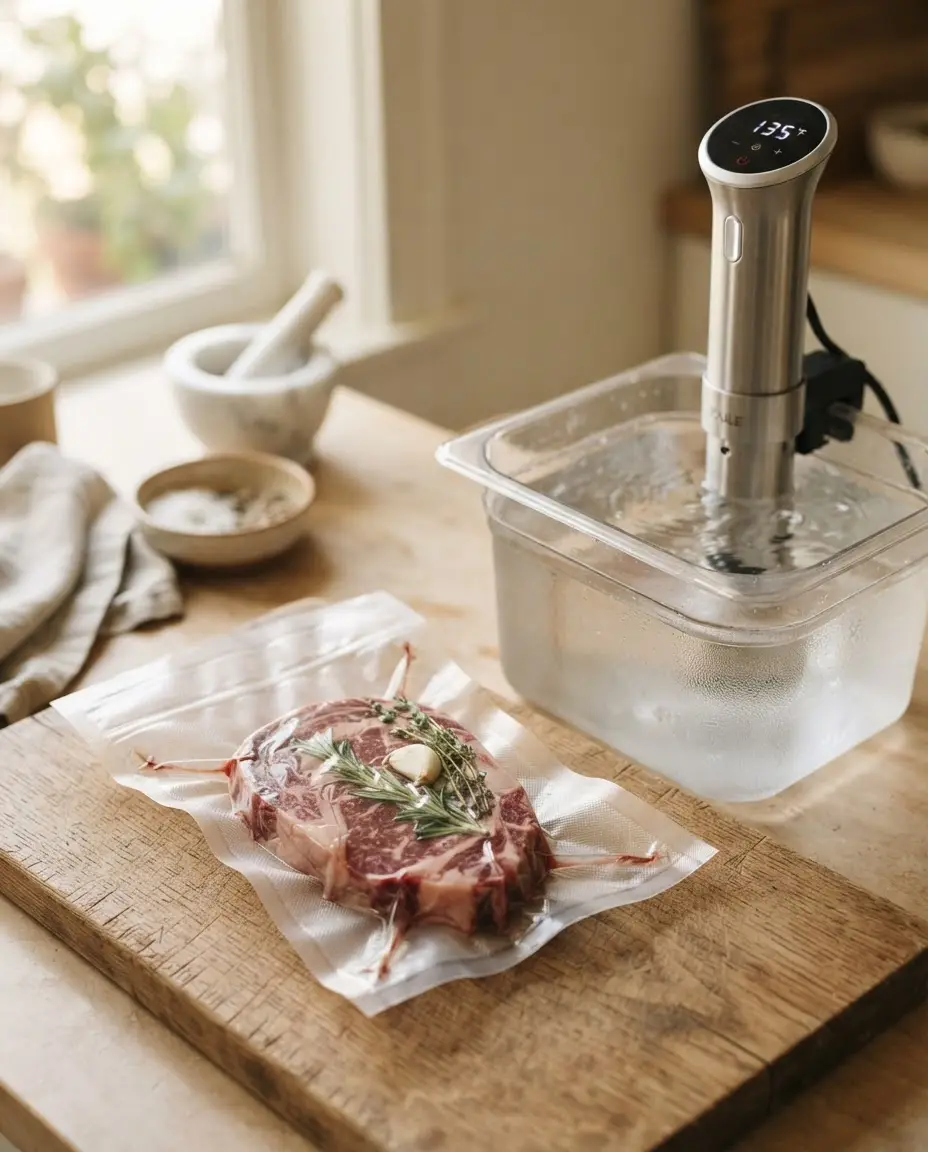
AI-generated editorial illustration; not a product or test photograph.
Short answer
Yes, you can absolutely sous vide a frozen steak directly from the freezer. Simply extend your standard cooking time by 30 to 50 percent to account for the initial thaw, ensuring the internal temperature reaches your target. This method is perfectly safe as long as the circulator holds the water at a stable temperature for the duration of the cook.
6
Product listings discussed; not hands-on tests
6/6
Discussed listings with a recorded price
$17.99–$374.99
Recorded listing price range; not a complete setup cost
Key takeaways
Frozen steaks can move directly from the freezer to the water bath without prior thawing.
Add 30% to 50% extra time to the standard cooking duration to ensure the meat reaches the target temperature.
Always ensure your vacuum seal is secure to prevent water ingress during the longer cook time.
Using an insulated container helps maintain steady temperatures during the extended cook cycle.
Pat the steak dry immediately after removing it from the bag to ensure a perfect sear.
Products discussed in this article
Editorial scores and recorded prices are reference points, not measurements of suitability for every use. Read each review's specifications and limitations.
Anova Culinary Sous Vide Precision Cooker Nano 2.07.7
NKBIRD WIFI Sous Vide Cooker ISV-100W, 1000 Watts8.4
EVERIE 12Qt Sous Vide Container Kit w/Collapsible Lid8.7
FoodSaver Custom Fit Vacuum Sealer Rolls, Airtight8.6
TBTeek Kitchen Butane Torch with Safety Lock8.1
Anova Culinary Sous Vide Precision Cooker Pro, 12008.4
Recorded price (USD)
Anova Culinary Sous Vide Precision Cooker Nano 2.0$94.99
NKBIRD WIFI Sous Vide Cooker ISV-100W, 1000 Watts$95.99
EVERIE 12Qt Sous Vide Container Kit w/Collapsible Lid$54.95
FoodSaver Custom Fit Vacuum Sealer Rolls, Airtight$26.99
TBTeek Kitchen Butane Torch with Safety Lock$17.99
Anova Culinary Sous Vide Precision Cooker Pro, 1200$374.99
Equipment for Sous Vide Frozen Steak
Product
Type
Wattage
Best For
Anova Nano 2.0
Circulator
750W
Small-batch cooking
Inkbird ISV-100W
Circulator
1000W
Fast preheats
Anova Pro
Circulator
1200W
High-volume batch
EVERIE 12Qt Kit
Container
N/A
Longer cooks
FoodSaver Rolls
Bags
N/A
Custom sizes
TBTeek Torch
Torch
N/A
Edge searing
Is Sous Vide Cooking Frozen Steak Safe?
Safety is the primary concern when considering frozen ingredients. According to standard sous vide practices, there is no biological danger in cooking frozen steak directly, provided your immersion circulator is capable of maintaining a constant, precise temperature. When you place a frozen steak into a water bath, the initial drop in water temperature is normal; a high-wattage circulator like the NKBIRD ISV-100W will quickly recover to your set point. The key is to avoid setting your target temperature in the "danger zone" (below 130°F) for extended periods to ensure food safety guidelines are maintained.
Because the interior of the steak is frozen solid, it takes longer for the thermal energy to penetrate the muscle fiber. If you follow standard timing charts for fresh cuts found in our guide to sous vide, your steak will likely be undercooked in the center. By increasing the total cook time by roughly 50%, you allow the core of the protein to thaw safely while in the vacuum-sealed pouch. Never attempt this with thin, pre-marinated cuts unless you have successfully vacuum-sealed them using a dedicated sealer that can handle the transition from frozen to heated without seal failure.
Consistency remains the hallmark of sous vide cooking. When dealing with frozen items, the seal integrity is tested more rigorously due to the ice crystals inside the bag. If you are using standard vacuum bags, verify that the edges are perfectly sealed before freezing to avoid leaks. Remember that while a powerful circulator helps reach the set temperature faster, the internal consistency of your finished product depends on your patience and the insulation of your water vessel.
The secret to successful frozen sous vide lies in the pre-freezing preparation. If you intend to cook a steak from frozen later, you must vacuum-pack it while it is fresh. Use a high-quality, BPA-free bag like those found in the FoodSaver rolls to ensure the plastic can withstand both the freezer environment and the long-duration heat of the water bath. Avoid adding loose liquids or marinades before freezing if you are using an edge sealer; these machines cannot effectively vacuum seal liquid-heavy preparations without drawing moisture into the pump mechanism.
When you freeze your steak, lay it as flat as possible in the freezer. A thin, flat profile is much easier to heat uniformly than a thick, irregular shape. During the freezing process, be mindful of how the ice crystals might form; sharp bone edges can puncture standard plastic bags, leading to water ingress during the bath. If you are preparing bone-in cuts, use a thicker gauge bag or consider wrapping the bone with a protective food-safe layer. Once you are ready to cook, simply pull the pouch directly from the freezer and submerge it in the water bath.
Maintaining the correct temperature is far easier when using dedicated equipment. Even a reliable entry-level unit like the Anova Nano 2.0 will perform admirably if the bath volume is managed correctly. If your frozen steak is particularly thick, such as a large ribeye, consult our specific tips on how to sous vide ribeye steak to adjust for the extra density and thawing time. Remember, the goal is to provide a stress-free environment for the steak to reach the exact internal doneness you desire, regardless of its starting frozen state. By organizing your storage, you can streamline the process significantly.
Always check your vacuum seal before freezing. Any air gaps can lead to floating pouches or leaks during long immersion times.
Thermal Efficiency and Water Preservation
Longer cooking times mean more opportunities for evaporation, which can trigger low-water alerts on many immersion circulators. When cooking frozen steak, the bath runs longer than usual, making a fitted lid an absolute necessity. Using an EVERIE container kit helps mitigate heat loss and prevents the water level from dropping below the minimum immersion line. Without a lid, the energy required to maintain a precise temperature increases significantly, putting unnecessary strain on the heating element of your circulator.
Thermal insulation also plays a vital role. Using a neoprene sleeve or an insulated container prevents the ambient kitchen air from cooling your water bath. This is especially important when you are compensating for the frozen nature of the steak, as the bath will fight to maintain equilibrium while the ice melts. If you notice your circulator is struggling, it is often due to heat loss through the vessel walls rather than a lack of power. By investing in a dedicated sous vide container that features an insulating sleeve and a hinged lid, you can ensure that your long, slow cook proceeds without interruption.
Furthermore, keep in mind that the total time for a frozen steak includes the thaw time plus the actual cook time. For example, a steak that normally takes 1.5 hours might require 2.5 hours when frozen. By monitoring the bath temperature via your circulator’s app or interface, you can ensure the meat is fully pasteurized throughout. Don't worry about the "overcooking" aspect; one of the primary benefits of this technique is that the meat will remain at the set water temperature once it is fully thawed and brought to the core temperature, effectively halting further temperature rise, which makes this an incredibly reliable method for home meal planning.
Once your steak has completed its long bath, the exterior will be pale and lack the appetizing crust associated with a perfect steakhouse finish. This is normal for all immersion cooking, but it becomes even more critical for frozen-thawed cuts, which may have excess surface moisture. Pat the steak thoroughly dry with paper towels immediately upon removal from the vacuum pouch. If there is any moisture on the surface, the heat from your searing tool will turn that water into steam, preventing the desired browning effect.
A culinary torch is a fantastic tool for finishing proteins that have been sous vide cooked, especially if you want to avoid overcooking the edges of a perfectly uniform steak. If you prefer the traditional method, use a heavy cast-iron skillet preheated to a high temperature. Because the steak is already cooked to your target, the sear needs to be fast and intense—ideally under 60 seconds per side. Using a torch allows you to precisely target the browning on edges and fat caps without needing to adjust the internal temperature of the meat.
Remember to avoid common mistakes such as searing while the meat is still wet or using poor-quality fat that might burn too quickly. Your goal is the Maillard reaction, which is only possible with a dry surface and high heat. Whether you choose a cast-iron skillet or a butane torch, the final result should be a beautiful, dark-crusted exterior surrounding the perfectly cooked, edge-to-edge pink interior that only the sous vide method can provide. Always follow safety instructions provided by the manufacturer when using high-heat searing tools in your home kitchen. Using a pro-level device like the Anova Pro for the initial cook can also provide the consistency needed for high-quality results across large batches, provided you manage the searing stage with equal care afterward.
Flatten your steaks in the bag before freezing. A thin, uniform shape ensures faster, more even heating once in the water bath.
Choosing the Right Hardware for Extended Cooks
When you commit to sous vide, particularly with longer times required for frozen proteins, your equipment selection determines the reliability of your session. While entry-tier immersion circulators often feature adequate temperature control, their wattage limits how fast they can overcome the cold mass of a frozen item. A high-wattage heater, like the 1200-watt Anova Pro, provides a significant advantage when starting with a frozen block, as it minimizes the time the water bath spends recovering its set temperature. This efficiency is a core factor in professional-grade performance.
Additionally, consider the circulation flow rate. More powerful motors, often found in units exceeding 1000 watts, ensure that the water doesn't develop thermal stratification zones as it works to melt the internal ice in the steak. If you are using a larger 12-quart container, a stronger circulator ensures the water stays moving, which is critical when a frozen steak acts as a heat sink. Many users neglect the importance of the container itself; however, a dedicated, rigid polycarbonate vessel ensures that your circulator is not vibrating against a metal pot wall, which reduces noise and improves overall stability throughout your sous vide sessions.
Lastly, ensure your container setup accommodates the size of your steaks. If you are planning a large batch, you must have enough room for the water to circulate between the pouches. Clumping frozen steaks together will drastically increase the time needed to bring them to temperature, potentially causing uneven results. Use a divider rack if necessary to maintain airflow. By matching your circulator's heating capacity with an insulated, appropriately sized vessel, you create a robust, repeatable system for preparing high-quality proteins from frozen states that rival the results of any fresh-thawed preparation.
Vacuum sealing is the final, non-negotiable step for success. If your bag seal fails due to ice-related expansion, your steak will suffer from water logging, which ruins the texture and flavor of the meat. When packaging, always leave enough room to account for the way meat expands and contracts. If you have any concerns about seal strength, the FoodSaver FM2100 and similar edge sealers offer a moist mode that helps ensure a more robust bond by preventing excess moisture from interfering with the heating element’s thermal weld.
Remember that vacuum bags are not all created equal. You need a multi-layered material capable of maintaining its structural integrity under the stress of heat, cold, and time. Generic, thin-gauge bags often experience micro-perforations in the freezer, leading to leaks. Investing in branded rolls or high-quality, pre-cut pouches like those from Wevac ensures that you are using a material rated for the temperature ranges required in sous vide. If you do find yourself with a leak during a long cook, you are losing more than just juices; you are diluting the natural seasoning and exposing the meat to potential bacterial degradation if the temperature stability is interrupted.
Always perform a quick "tug test" on the seal line before freezing. By applying gentle force to the sealed edge, you can verify it has fused correctly. If it pulls apart, reseal it immediately. This level of diligence pays off, especially for long-duration cooks required for tougher or frozen cuts. Your commitment to high-quality vacuum supplies directly protects the investment in your meat, ensuring every cook results in the exact, edge-to-edge finish you desire, with no risk of water penetration or loss of natural flavors, while also making the sous vide process predictable and stress-free for the home cook.
1Select your steak and vacuum-seal it using high-quality textured bags.
2Freeze the sealed steak until solid, keeping it as flat as possible.
3Fill your sous vide container with warm tap water to speed up the initial ramp-up time.
4Set your immersion circulator to the target temperature for your desired doneness.
5Submerge the frozen steak once the water reaches the set temperature.
6Add 50% more time to the standard recipe cook time to ensure full thawing.
7Remove the steak from the bag and pat it thoroughly dry.
8Sear the exterior using a hot skillet or culinary torch until browned.
Quick checklist
Verify your vacuum bags are freezer-safe and BPA-free.
Ensure the steak is laid flat in the bag before sealing to allow uniform thawing.
Increase your total cooking time by 30-50% to account for the frozen state.
Use a dedicated sous vide container with a lid to prevent water evaporation.
Pat the steak bone-dry after removing it from the bag for a superior sear.
Use a high-heat source like a cast-iron skillet or culinary torch for finishing.
Frequently asked questions
Can I put frozen steak directly into the sous vide?
Yes, you can place frozen steak directly into the bath. Simply extend the cook time by 30-50% to ensure the center reaches the target temperature. This is safe as long as your circulator maintains a stable temperature above the danger zone.
Does freezing meat change the sous vide texture?
Freezing can cause minor cellular breakdown due to ice crystals, but the sous vide process is gentle enough that most home cooks will not notice a difference in quality compared to fresh meat. Proper vacuum sealing is the best way to maintain texture.
What is the danger zone for sous vide cooking?
The danger zone is typically between 40°F and 130°F, where bacteria multiply rapidly. Since frozen steak starts cold, ensure your water bath reaches your target temperature quickly and avoid cooking at temperatures below 130°F for more than a few hours.
Do I need to change my target temperature for frozen steak?
No, you do not need to change the temperature. You only need to increase the total time. The target temperature remains the same as it would be for a fresh steak to achieve your preferred level of doneness.
Why did my steak turn out grey instead of brown?
This happens if you do not sear the steak after taking it out of the bag. The sous vide process cooks the meat perfectly but does not provide a crust. You must finish it with a high-heat sear for color and flavor.
Amazon links are affiliate links; we may earn a commission at no cost to you.
Shortlists in this category
Ranked lists from our sous vide cooking reviews, limited to listings whose titles confirm the product type, with budget cuts where enough recorded prices sit on both sides of the line.
This page summarizes our research reviews of Amazon listings, listed specifications and captured buyer ratings. It is not a hands-on test. Scores are editorial assessments, not measured performance; prices are recorded snapshots and may change. A category can include both main products and accessories, so its overall price range is not the cost of a complete setup.
Most recent product record update: September 27, 2026. Individual records may be older; this is not a verification date for every claim. Prices on this page were read from the listings Nov 8, 2026 – Nov 12, 2026.
Choose the product type first. These groups require a match in the listing title; an import search term alone is not enough. Scores rank our recorded research assessments within each group, not independently measured performance.
Wattage sets how fast you come to temp, not how well you hold it.
Chamber sealers generally handle liquids more easily; for edge sealers, follow the model's instructions and avoid drawing liquid into the pump.
A fitted lid cuts evaporation on long cooks.
If a specification, certification or compatibility detail is absent, mark it as unknown and ask the seller or manufacturer. Do not substitute a star rating, an editorial score or a different model's specification.