How to Install a Smart Thermostat: DIY Setup Guide
Upgrade your home climate control with our step-by-step installation guide for modern smart thermostats.
By the Niche Picks editorsUpdated November 9, 202610 min readDrawn from our 35 research-based smart home devices reviews
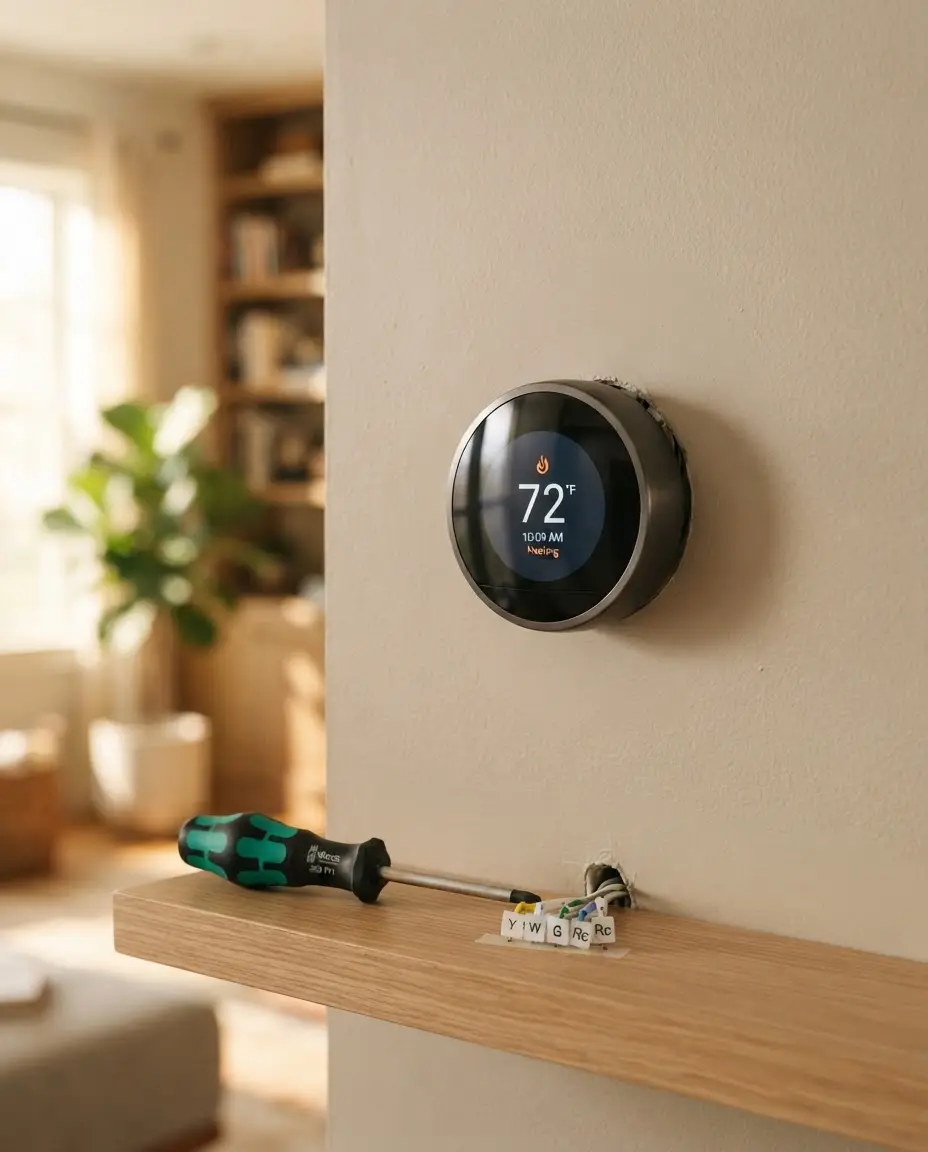
AI-generated editorial illustration; not a product or test photograph.
Short answer
Installing a smart thermostat involves turning off your HVAC power, labeling existing wires, and mounting the new backplate. Most systems use 24-volt wiring, but often require a common (C) wire for steady power. Always verify system compatibility and follow the specific manual for your model to ensure safe, effective installation.
4
Product listings discussed; not hands-on tests
4/4
Discussed listings with a recorded price
$56.99–$238.99
Recorded listing price range; not a complete setup cost
Key takeaways
Most smart thermostat installations require identifying and labeling wires before removing your old unit.
A C-wire is often necessary for smart thermostats to maintain a continuous 24-volt power connection.
Turn off power at your circuit breaker before touching any wiring to prevent electrical shorts.
Smart thermostats like the Sensi ST55 are designed for easier DIY installation with traditional setups.
Using apps to track usage helps verify if your smart thermostat is actually helping to save money.
Products discussed in this article
Editorial scores and recorded prices are reference points, not measurements of suitability for every use. Read each review's specifications and limitations.
Google Nest Thermostat - Smart Thermostat for Home7.4
Amazon Smart Thermostat, Save money and energy, Works6.8
Sensi Smart Thermostat, Wi-Fi, DIY, Alexa, Energy Star7.6
ecobee Smart Thermostat Premium - WiFi, Siri & Alexa8.2
Recorded price (USD)
Google Nest Thermostat - Smart Thermostat for Home$104.00
Amazon Smart Thermostat, Save money and energy, Works$56.99
Sensi Smart Thermostat, Wi-Fi, DIY, Alexa, Energy Star$89.99
ecobee Smart Thermostat Premium - WiFi, Siri & Alexa$238.99
Smart Thermostat Comparison
Product
Connectivity
Power Source
C-Wire Required
Google Nest
Wi-Fi
Battery
No
Amazon Smart
Wi-Fi
C-wire
Yes
Sensi ST55
Wi-Fi
Battery/C-wire
No
ecobee Premium
Wi-Fi
C-wire
Yes
Compatibility Checks Before You Begin
Before beginning, confirming system compatibility is the most critical step. Not all HVAC systems use the same wiring; most smart thermostats work on 24-volt systems, but high-voltage electric baseboard heaters are generally incompatible with standard consumer units. Take a high-resolution photo of your existing wiring on the current backplate, noting the specific letter codes—such as R, W, Y, G, and C—attached to each terminal. This visual record is your primary safety reference. You can browse our smart home device FAQ to learn more about identifying your specific HVAC configuration.
Check if your system has a dedicated C-wire, which provides constant power.
Ensure your Wi-Fi network reaches your thermostat location with a stable signal.
Many entry-level models, such as the Google Nest Thermostat, are built for straightforward installations, yet they still require precise wiring identification. If you are dealing with older hardware, the Sensi ST55 is frequently praised for its familiar form factor and user-friendly wiring support. If your current system is incompatible, do not force the installation, as this can damage sensitive control boards. Always refer to the manufacturer's specific installation guide for your hardware model. If you are worried about the impact on your utility bills, our deep-dive analysis on if smart thermostats save money can help you decide if the switch is worth the effort for your specific household layout and local energy costs.
Understanding Power and Wiring Requirements
Modern smart thermostats often act as miniature computers, requiring consistent power to keep Wi-Fi radios active and displays lit. In standard residential HVAC, this is managed by the common wire, or C-wire. The Amazon Smart Thermostat explicitly requires a C-wire, making verification essential before purchase. Without this terminal, the system may struggle to maintain a connection, leading to intermittent failures or the need for expensive, secondary power accessories. It is common to find older homes lack this wire entirely, necessitating either a new wire pull by an HVAC professional or the use of an add-on power kit provided with your thermostat.
The C-wire provides a complete circuit for continuous 24-volt power.
Many modern units can harvest power from existing heating and cooling wires, but this can cause clicking or system cycling.
If your system does not have a C-wire, check the manufacturer's box for an included power extender or C-wire adapter.
Always turn off the power at the circuit breaker box, not just at the wall unit.
Use the budget planner to account for potential additional costs, like professional wiring adapters or C-wire kits.
If you are using a multi-protocol hub like the Aeotec Smart Home Hub to manage your home, check how your thermostat communicates. Some models are purely cloud-dependent, while others allow for local-only command sets if you use a smart home hub that is Matter or Thread compliant. Proper wiring is the foundation of long-term reliability. Misinterpreting the wire labels can result in blown fuses on your HVAC control board, a common mistake to avoid in smart home setups. By taking the time to map each connection to the terminal labels rather than colors, you ensure the device functions correctly upon the first power-up.
Turn Off The Power
Always turn off the power to your HVAC system at the circuit breaker before removing the old thermostat. Touching live wires can damage your thermostat's control board or cause a blown fuse.
Step-by-Step Hardware Installation
The physical installation is a logical process if you take it slow and methodical. Start by powering down your HVAC system at the main circuit breaker. This is non-negotiable for safety. Once the power is off, confirm by checking the existing display; if it is blank, you are safe to proceed. Remove the thermostat cover carefully. Use the provided wire labels or small pieces of masking tape to mark each wire based on the terminal letter it was connected to on the old unit. Do not assume wire color corresponds to the label, as past installations often ignore industry color standards.
Shut off power at the main circuit breaker.
Remove the existing thermostat cover and label all wires immediately.
Disconnect the wires and unscrew the old backplate from the wall.
Mount the new backplate using the provided anchors and the integrated spirit level.
Insert wires into the corresponding terminals on the new unit until they lock.
Secure the smart thermostat display onto the mounting base.
Restore power at the breaker box and follow the app-based setup instructions.
When mounting the new backplate, be mindful of the cable length. If the wires are brittle or frayed, trim them back carefully to expose fresh copper before inserting them into the push-connect terminals. The Sensi ST55 is specifically designed to cover the footprint of older units, which saves time on wall repairs or painting. For larger, more modern devices like the ecobee Smart Thermostat Premium, use the included trim plate to hide any unsightly holes or unpainted areas from previous, smaller models. Once the unit is physically secured, ensure the wires are tucked neatly behind the device so the backplate can sit flush against the wall for a professional, clean finish.
App Configuration and Network Pairing
After the hardware is physically installed and power is restored, the focus shifts to the companion app and Wi-Fi pairing. Most smart thermostats, including the Google Nest Thermostat, rely heavily on an app for initial registration. The app will usually walk you through an equipment identification process, asking you to confirm which wires you connected to which terminals during the previous step. This ensures the thermostat correctly controls your specific cooling, heating, or heat pump stages. If the app fails to recognize the connection, go back and double-check that every wire is pushed completely into its terminal block and that the locking mechanism is engaged.
Download the manufacturer's app and create an account.
Follow the prompts to pair your thermostat with your home Wi-Fi network.
Verify the system tests: listen for the furnace fan or AC compressor to turn on during the test mode.
Rename your thermostat in the app for easier voice assistant integration.
Share access with other household members through the manufacturer's mobile interface.
Connectivity is key to the 'smart' aspect of your new thermostat. During this phase, the device will often download firmware updates to ensure compatibility with local grid energy features and security protocols. If you are integrating with other devices, consult our guide on what is a smart thermostat to understand the features your new device offers. Some models allow you to bridge climate control into larger automation systems. For example, if you are looking to centralize your home, our smart home device buying tips can help you decide how to group your thermostat with other accessories like smart locks or lights. If your internet connection is unstable, keep in mind that many of these devices have limited local-control options, meaning they may default to their last known setpoint if the cloud connection is lost.
Label Your Wires
Take a photo of the wiring on your old thermostat and use the labels provided in the box. Do not rely on wire colors, as they are not always consistent with standard HVAC wiring conventions.
Optimizing Your Smart Climate Control
Once the unit is online, the real benefit comes from automated setback behaviors. Modern units use occupancy data to lower energy use while you are away. Spend time in your companion app to refine these schedules. Unlike manual devices, smart thermostats record HVAC run-time data, which can be viewed in your app to identify patterns. For example, if you notice your unit running during peak energy rate hours, you can shift your heating and cooling setpoints to save money. We track the latest hardware in our smart home device category, where you can compare efficiency features across various brands.
Configure 'Home' and 'Away' schedules that align with your actual work or school hours.
Enable auto-schedule or geofencing features to adjust temperature based on your smartphone location.
Use the usage reports to verify that your HVAC runtime has decreased after the install.
Set up maintenance reminders, such as air filter change alerts, directly in the app.
Explore the smart home device FAQ to learn how to bridge your climate settings with other smart sensors.
Remember that while some thermostats are cloud-dependent, others offer partial local control if you incorporate a dedicated smart home hub. Monitoring your energy usage through the app is a powerful way to stay within your budget. If you notice unexpected behavior, such as your heating turning on when it should be off, check your wiring map again or ensure your Wi-Fi signal is not dropping. Many brands offer extensive troubleshooting guides within their apps, making it easy to fix minor configuration issues without calling a technician. Regular updates will keep your device running at peak efficiency, and you should take advantage of any energy rebates offered by your local utility providers, as many of these thermostats are Energy Star certified.
Maintenance and Long-Term Reliability
Smart thermostats are designed for years of operation, but they do require basic maintenance to ensure the sensors and software remain accurate. Dust buildup inside the device or on the room sensors can sometimes influence temperature readings. Periodically clean the exterior with a soft, dry cloth and ensure that the thermostat is not placed in direct sunlight, which can trick the sensor into reporting a higher-than-actual ambient temperature. If your model uses batteries as a backup, such as the Google Nest Thermostat, schedule a battery health check once a year to prevent leakage or power failure during an unexpected winter storm or power outage.
Dust the intake vents or sensor openings occasionally to ensure precise readings.
Check for firmware update notifications in your app to ensure the latest security patches are installed.
Monitor your app for any connection error alerts, which often signify a need to check your Wi-Fi router.
Review smart home mistakes to ensure your device is not in a location that inhibits accurate sensing.
Keep a copy of your wiring labels and photos saved to your cloud account for future reference.
If you move to a new house or upgrade your HVAC system, having that original photo of your wiring will make the transition much easier. While many smart thermostats will automatically detect your equipment, being prepared with your configuration history is the best way to handle technical hiccups. The smart home landscape is evolving, and sticking to devices that have clear, well-supported software environments is one of our top buying tips. For homes that rely heavily on integrated security, consider the trade-offs between proprietary ecosystem-locked thermostats and more open-protocol hardware. Reliable climate control is a core pillar of a smart house, and a properly installed, well-maintained smart thermostat will provide consistent, efficient performance for the life of your HVAC equipment.
Step by step
1Turn off power to the HVAC system at the circuit breaker.
2Remove the existing thermostat cover and take a photo of the wiring.
3Label each wire according to its existing terminal letter.
4Disconnect the wires and remove the old baseplate.
5Mount the new smart thermostat backplate to the wall.
6Connect the wires to the corresponding terminals on the new unit.
7Attach the thermostat display and restore power.
8Follow the manufacturer's mobile app instructions to complete the setup.
Quick checklist
Turn off HVAC power at the circuit breaker.
Verify system compatibility (24V system).
Take a photo of current wiring connections.
Label all wires before disconnecting.
Ensure your C-wire is present or verify alternative power methods.
Install the new mounting plate and level it.
Connect wires to the correct terminals.
Restore power and follow app setup.
Frequently asked questions
Do I really need a C-wire?
Many smart thermostats require a C-wire (common wire) to provide constant, steady power to the unit's Wi-Fi and display features. While some models offer battery-powered operation, a C-wire is more reliable. If your home lacks one, check if your thermostat includes a power adapter kit or consult an HVAC professional.
Can I install a smart thermostat myself?
Yes, installing a smart thermostat is a common DIY project for most homeowners. As long as you have basic tools, can follow simple wiring instructions, and feel comfortable turning off power at your circuit breaker, the installation should take under an hour. Always read your device's manual thoroughly before starting.
What if my old thermostat has different colored wires?
Wiring colors can vary by house and installer. Always rely on the letter code (R, G, Y, W, C) stamped on the thermostat terminal rather than the wire color. When in doubt, the photo you took before removing the old unit is your most reliable reference for matching the connections.
Will a smart thermostat work with my furnace?
Most smart thermostats are designed to work with common low-voltage HVAC systems, including furnaces, heat pumps, and central AC. However, they are generally not compatible with line-voltage systems like electric baseboard heaters. Always check the compatibility checker on the manufacturer’s website before purchasing.
What should I do if the screen doesn't turn on?
First, ensure the power is restored at the circuit breaker. Check that all wires are firmly seated in their terminals and that the thermostat is properly clicked into its baseplate. If it remains off, verify that your HVAC door switch is closed and the system is getting power.
Amazon links are affiliate links; we may earn a commission at no cost to you.
Shortlists in this category
Ranked lists from our smart home devices reviews, limited to listings whose titles confirm the product type, with budget cuts where enough recorded prices sit on both sides of the line.
This page summarizes our research reviews of Amazon listings, listed specifications and captured buyer ratings. It is not a hands-on test. Scores are editorial assessments, not measured performance; prices are recorded snapshots and may change. A category can include both main products and accessories, so its overall price range is not the cost of a complete setup.
Most recent product record update: October 3, 2026. Individual records may be older; this is not a verification date for every claim. Prices on this page were read from the listings Nov 8, 2026 – Nov 12, 2026.
Choose the product type first. These groups require a match in the listing title; an import search term alone is not enough. Scores rank our recorded research assessments within each group, not independently measured performance.
Values are shown as recorded, without unit conversions or inferred compatibility. Not recorded means unknown, not absent. Prices are snapshots, not current offers. Editorial scores are research judgments, not lab results. Amazon links are affiliate links.
Before treating a comparison as complete
Which details are still unknown?
A specification appearing in a listing is not independent verification. These counts show which shortlisted records contain the same field; a blank record does not mean the product lacks the feature.
Connectivity Technology
Recorded for 2 of 2 shortlisted models
Present in every shortlisted record. Check units, exact variants and the current manufacturer documentation before relying on it.
Power Source
Recorded for 2 of 2 shortlisted models
Present in every shortlisted record. Check units, exact variants and the current manufacturer documentation before relying on it.
Voltage
Recorded for 2 of 2 shortlisted models
Present in every shortlisted record. Check units, exact variants and the current manufacturer documentation before relying on it.
Check Matter compatibility and whether Thread requires a border router; ecosystem support and local-control features vary by device.
Prefer local control; cloud-only devices die with their service.
Read the subscription terms before buying any camera.
If a specification, certification or compatibility detail is absent, mark it as unknown and ask the seller or manufacturer. Do not substitute a star rating, an editorial score or a different model's specification.